One of the most effective ways to increase your Shopee sales is to improve the visual appeal of your business page. Shop Decoration helps you do that in the easiest and most convenient way possible. Why it may seem trivial to your operations – taking the extra time to decorate your shop according to your customers’ preferences is one of the cost-efficient ways to increase your credibility.
Read: Selling on Shopee – 6 Biggest Success Factors For A Shopee Seller
Benefits Of Using Shop Decoration
- It can bring additional traffic to your business page
- You can showcase your best selling products as well as promotions as to increase visibility and exposure
- This lets you create a layout that is best suited to your brand
- Your brand can stand out from competitors
- If done well, you will get more clicks and a higher conversion rate
How To Use Shop Decoration
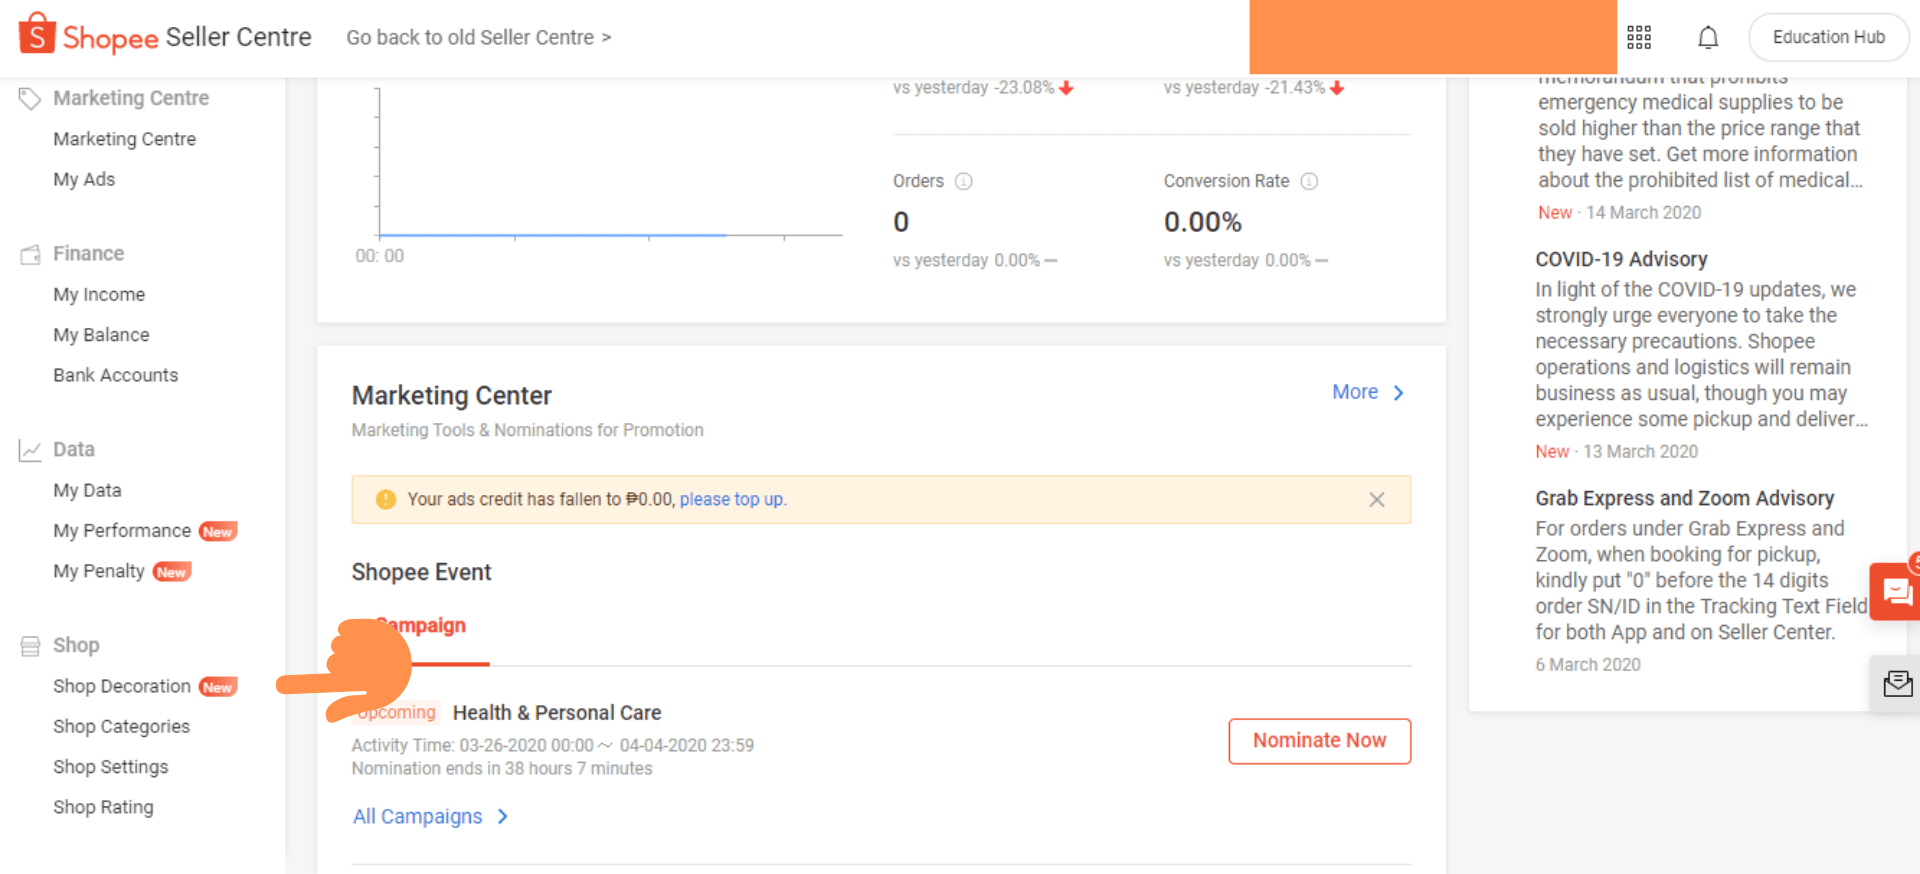
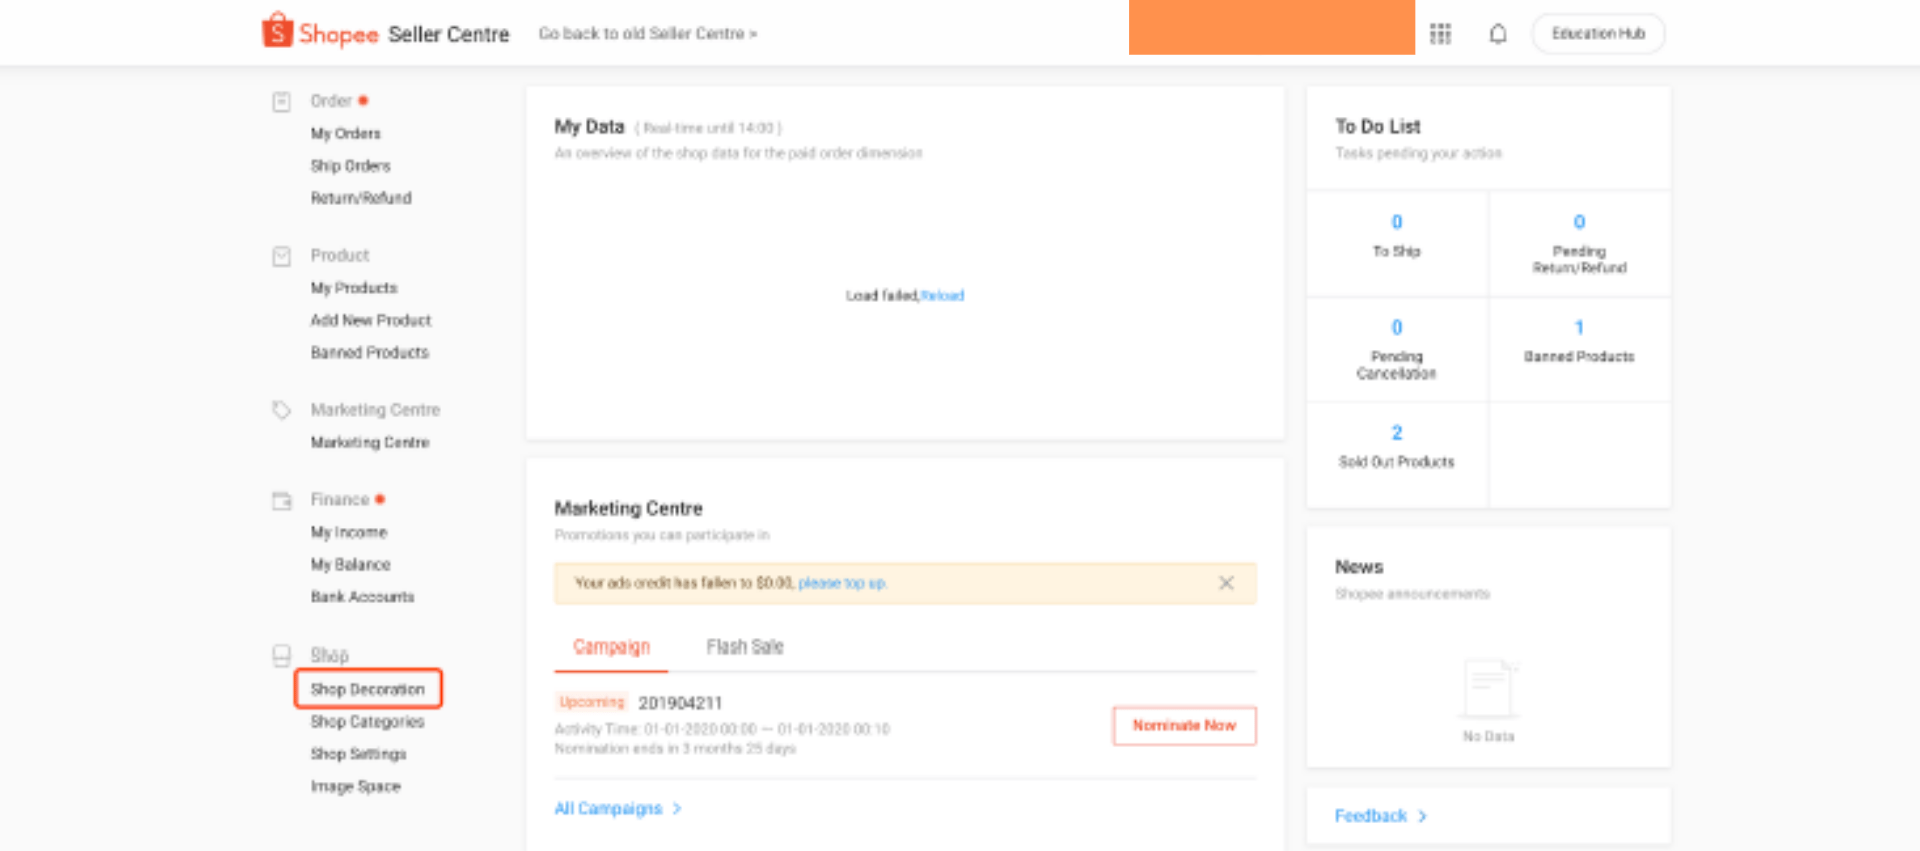
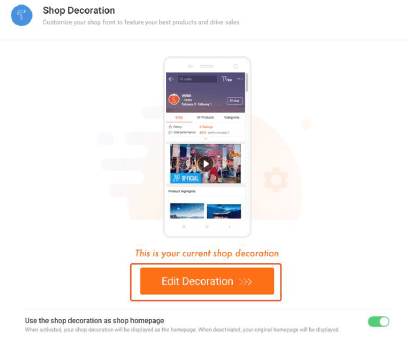
Log in to Shopee Seller Centre. Find the Shop menu on the sidebar and then click Shop Decoration.
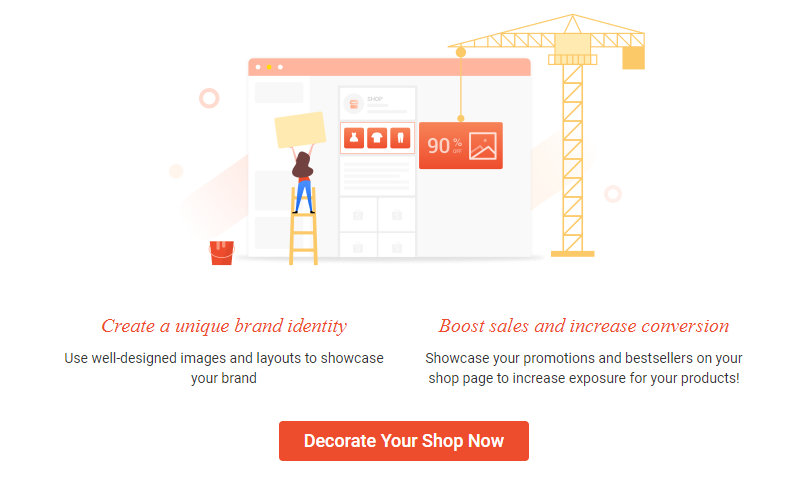
Click Decorate Your Shop Now.
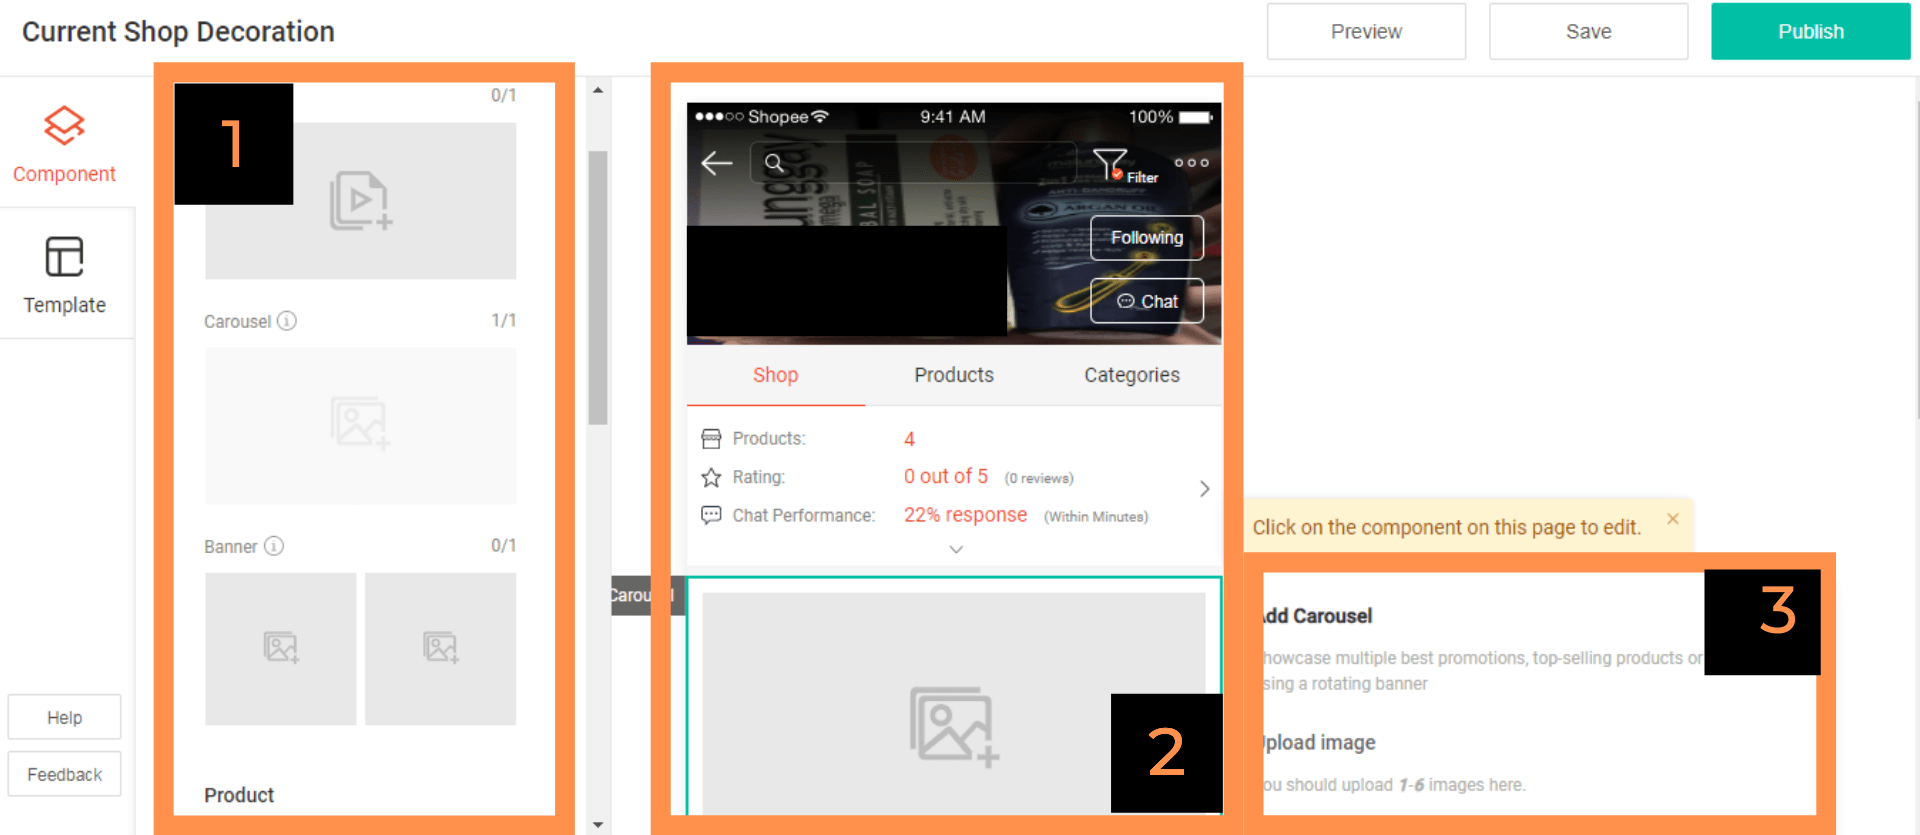
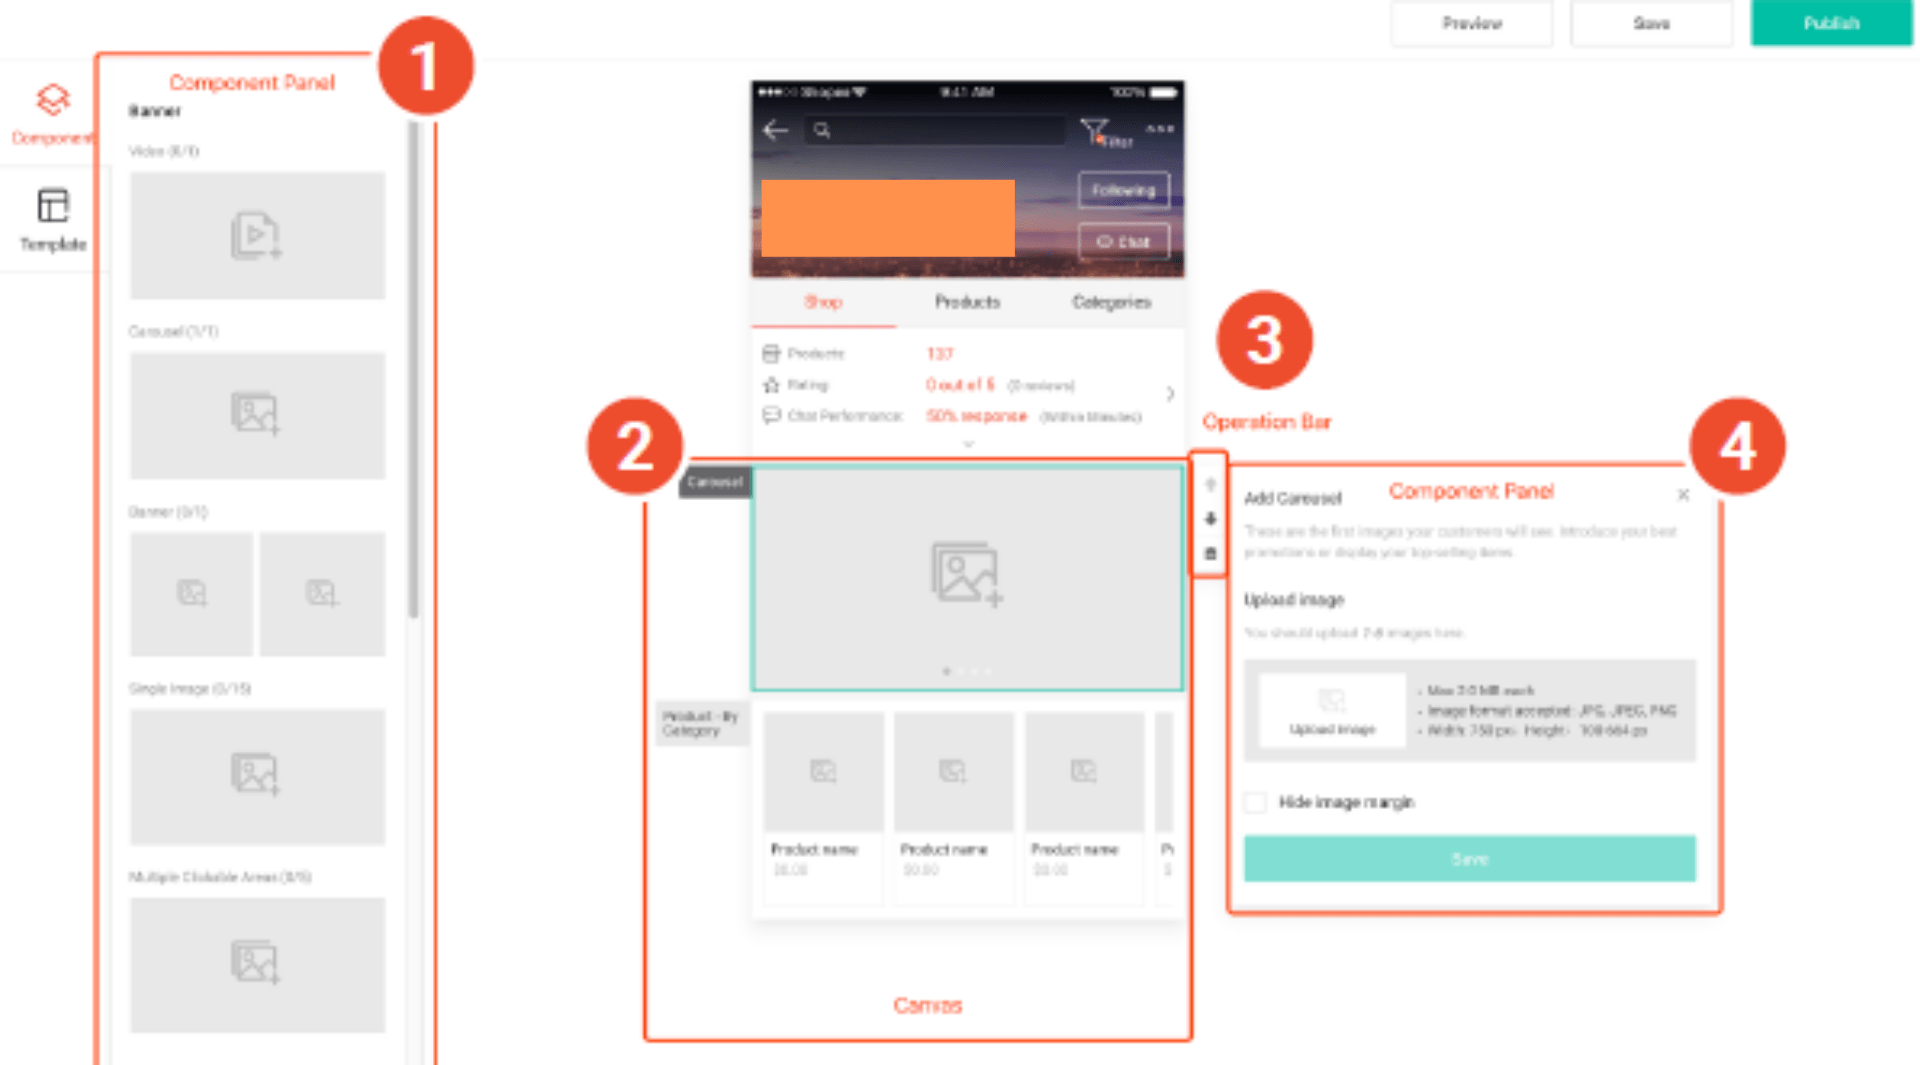
To give you an introduction to Shop Decoration, section number one as illustrated in the image above refers to the component panel. This is where you can add videos, carousels, and other design patterns to your shop business page. A carousel is a feature that lets you display various photos in a certain order.
The component panel is also the place where you can add banner images as well as the products that you want to highlight in your shop. There is also an option to add products by category.
The second section illustrated in the image pertains to the canvas. This serves as a preview for you to see how your shop will look like depending on the way you customize your business page.
The third section refers to the component property panel. This is where you can input or edit the component properties that you uploaded from the component panel.
Types Of Decoration Components
In the previous paragraph, we talked about the component panel, the component property panel as well as the canvas where you can view what your profile looks like.
Now, it is time to identify and define what components you will be working with when you open Shop Decoration.
Here is a table to quickly summarize everything.
| Component | Maximum |
| Video | 1 |
| Carousel | 1 |
| Banner Image | 1 |
| Product Highlights | 5 |
| Product By Category | 5 |
| Category | 1 |
Definition Of Terms
Carousel – This is a feature that lets you display up to six images in rotation. You can also hyperlink each image to a product listing page or category page to encourage buyers to make a purchase.
Product By Category – this lets you showcase up to eight products under a category. You can also link it to a product page as well.
Video – this lets you introduce your brand or set of products in video format. Right now, the only accepted format is YouTube URLs. The video thumbnail that will be used in your shop is the same one that you used on your YouTube account. You have to head to your YouTube account if you want to change it.
Banner – you can select two images to be showcased on your Shopee homepage. You can use either a promotional image or two of your bestselling products.
Product Highlights – you can attract people’s attention towards your bestselling products through this feature.
You can add the Product Highlights component five times. In each set, there can only be a maximum of four products.
Category – you can highlight four to eight of your most popular categories in this section. You add four to ten categories.
How To Add A Component
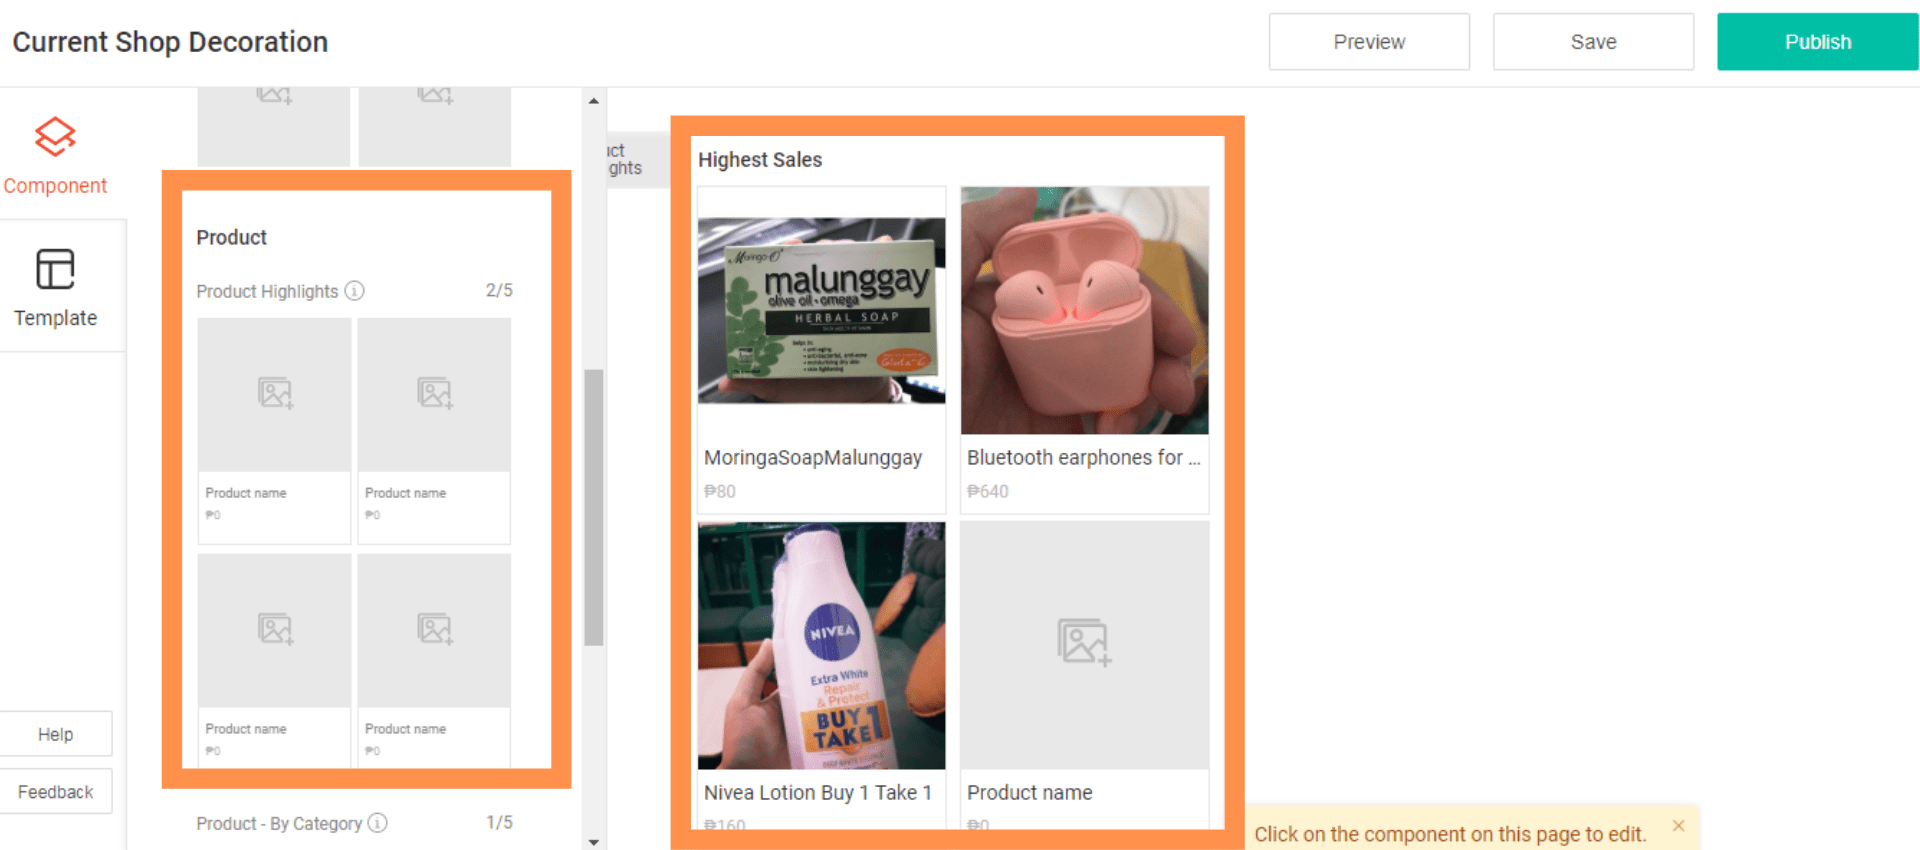
Click any component from the Components Panel and watch it be added to the canvas. For instance, there is already a Products Highlight component on the canvas by default. This means if you click Products Highlight, it will add a second component on the canvas.
You have the ability to add five Products Highlight components to the canvas overall. This means, your maximum Products Highlight components will be reduced to three since you have already used up two of them.
Carousel
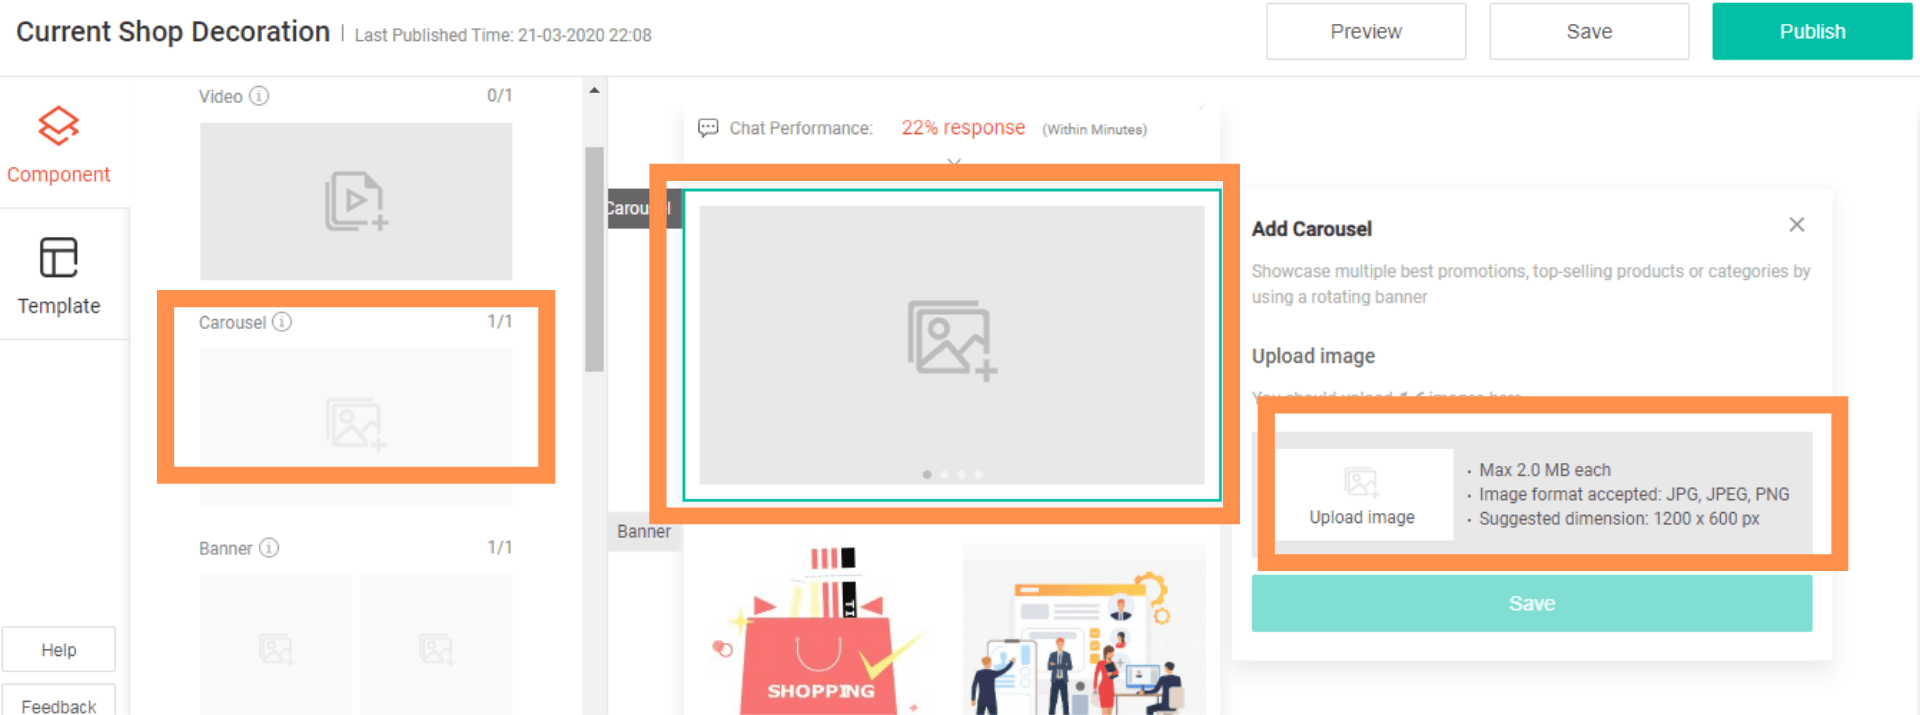
Click the carousel component from the Components panel. You have the ability to add up to six images in a carousel. Add your first image by clicking on the upload image thumbnail on the components property panel. As you add your first image, a new slot will open for the next image.
You can add a hyperlink to your image. This is optional. You can rearrange the images as you please. Take note that the image dimensions need to be 1200px in width and 600px in height.
Products By Category
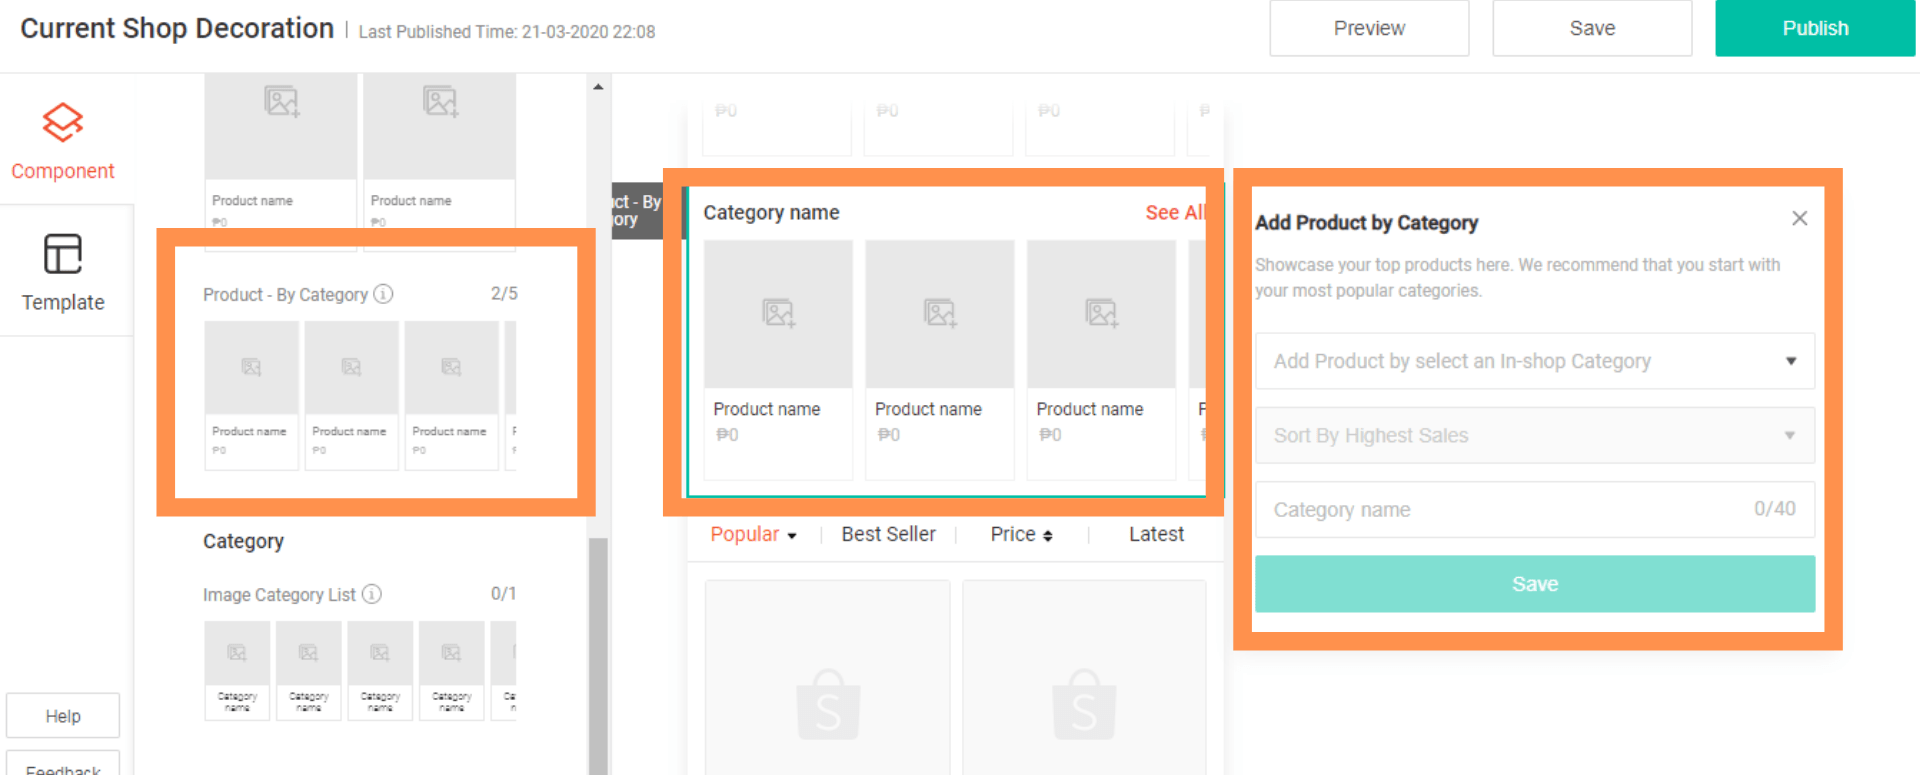
Click Product By Category in the component panel.

Choose an active in-shop category to get started.

Hover your arrow on the first box and click My Shop Category.
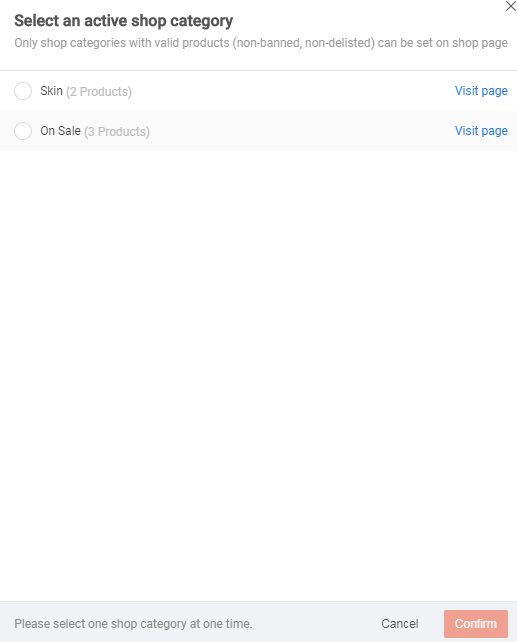
Choose the active category that you want to use and click Confirm.
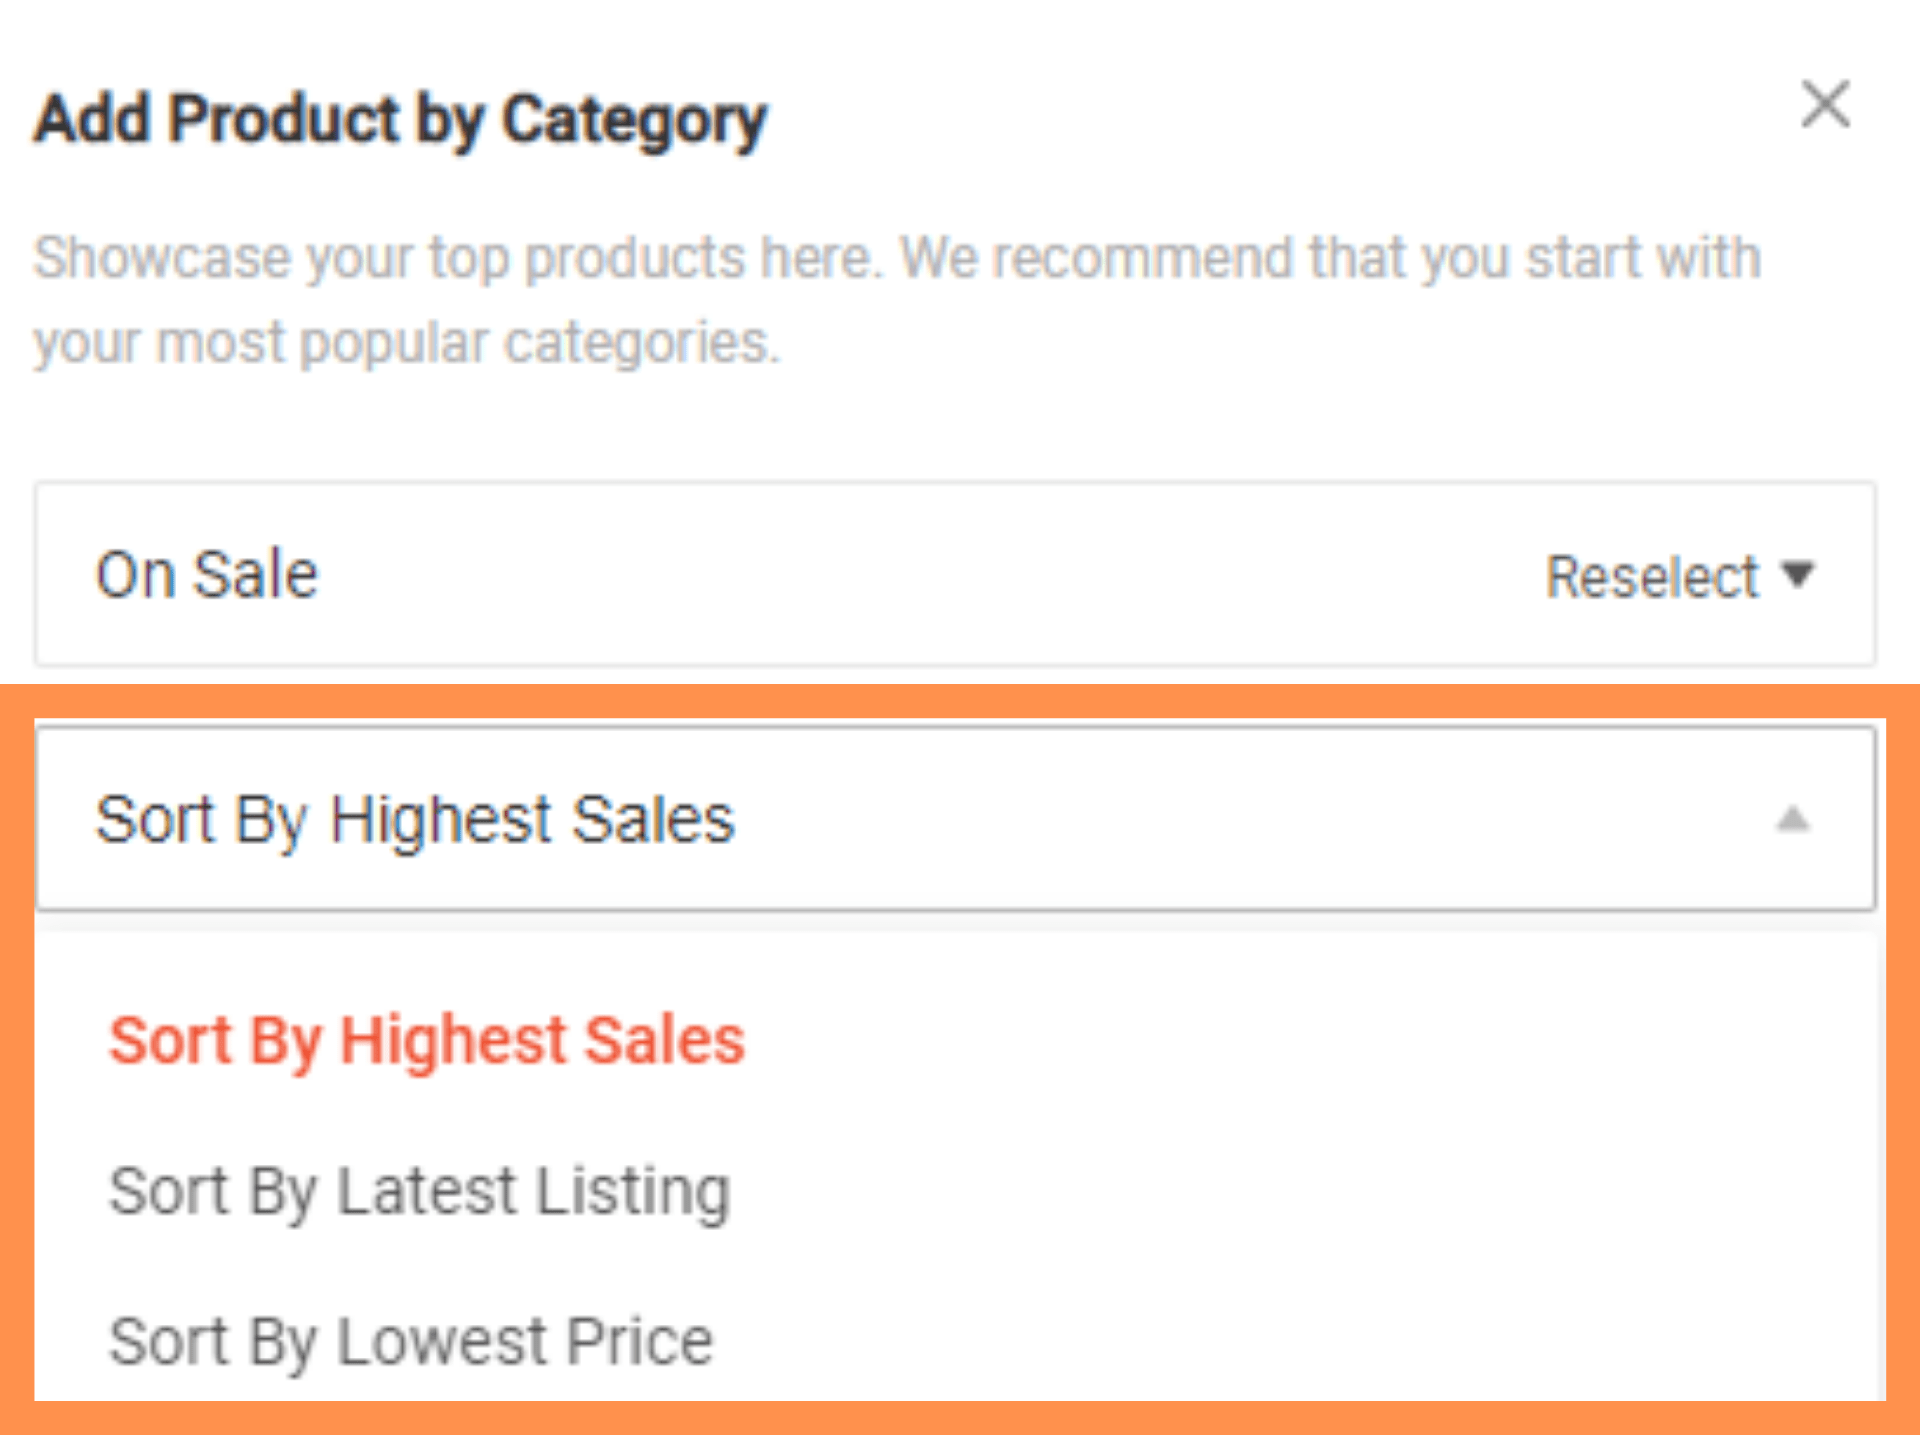
Click Sort By Highest Sales and choose a sorting format that you are most comfortable with.
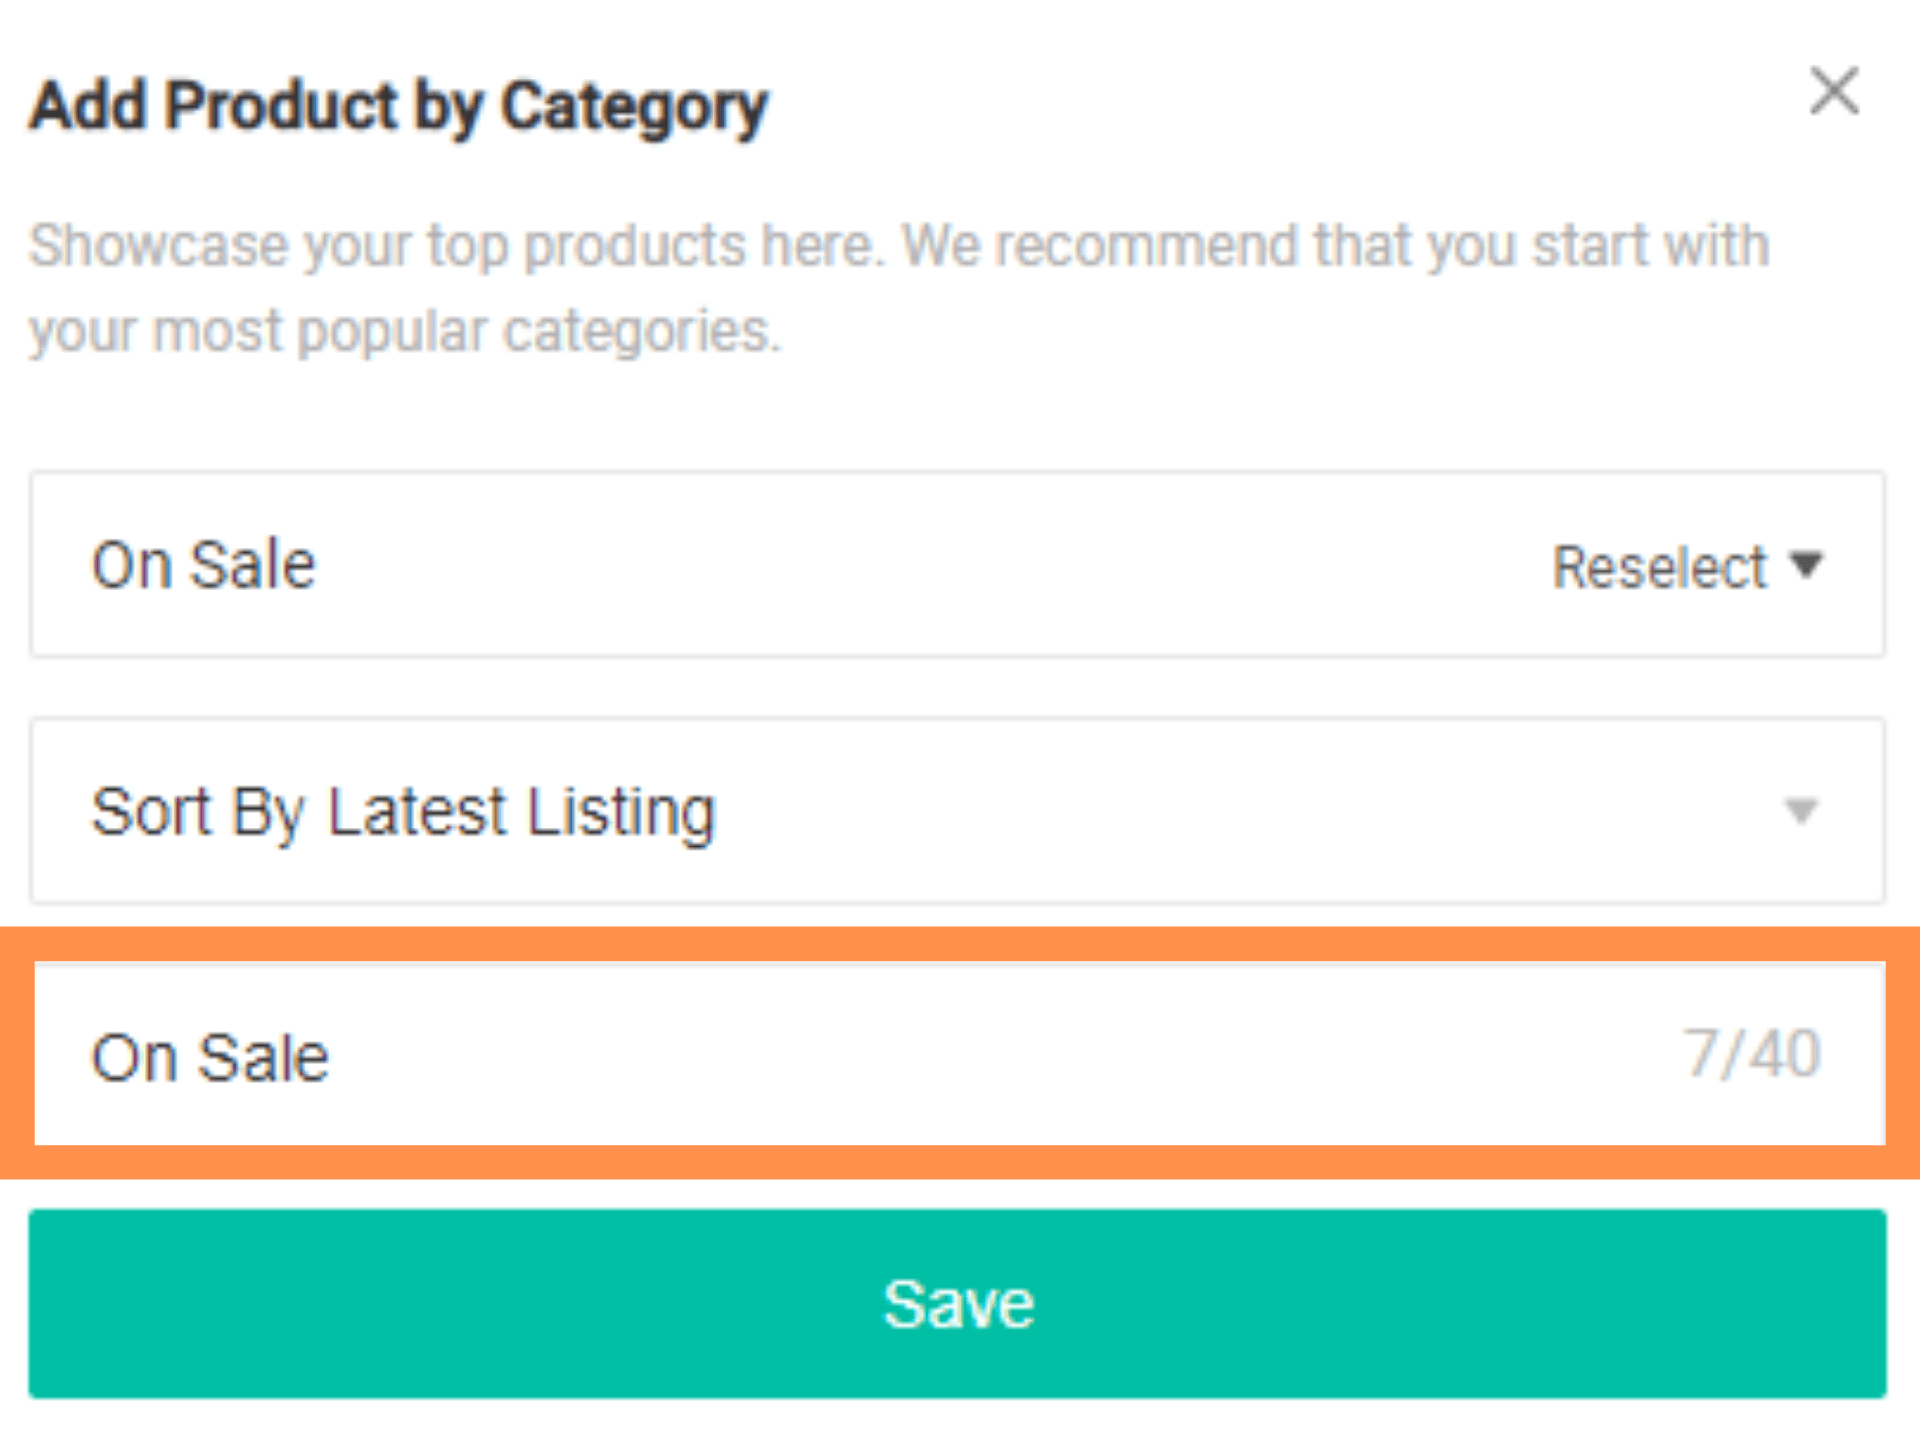
By default, the category name will be the same as the one on your original category list but you have the option to change it or keep it as is.
Click Save.
This feature comes with a See All button. When a buyer clicks this, he will be directed to a new page where he will see all your products under your chosen category.
Video
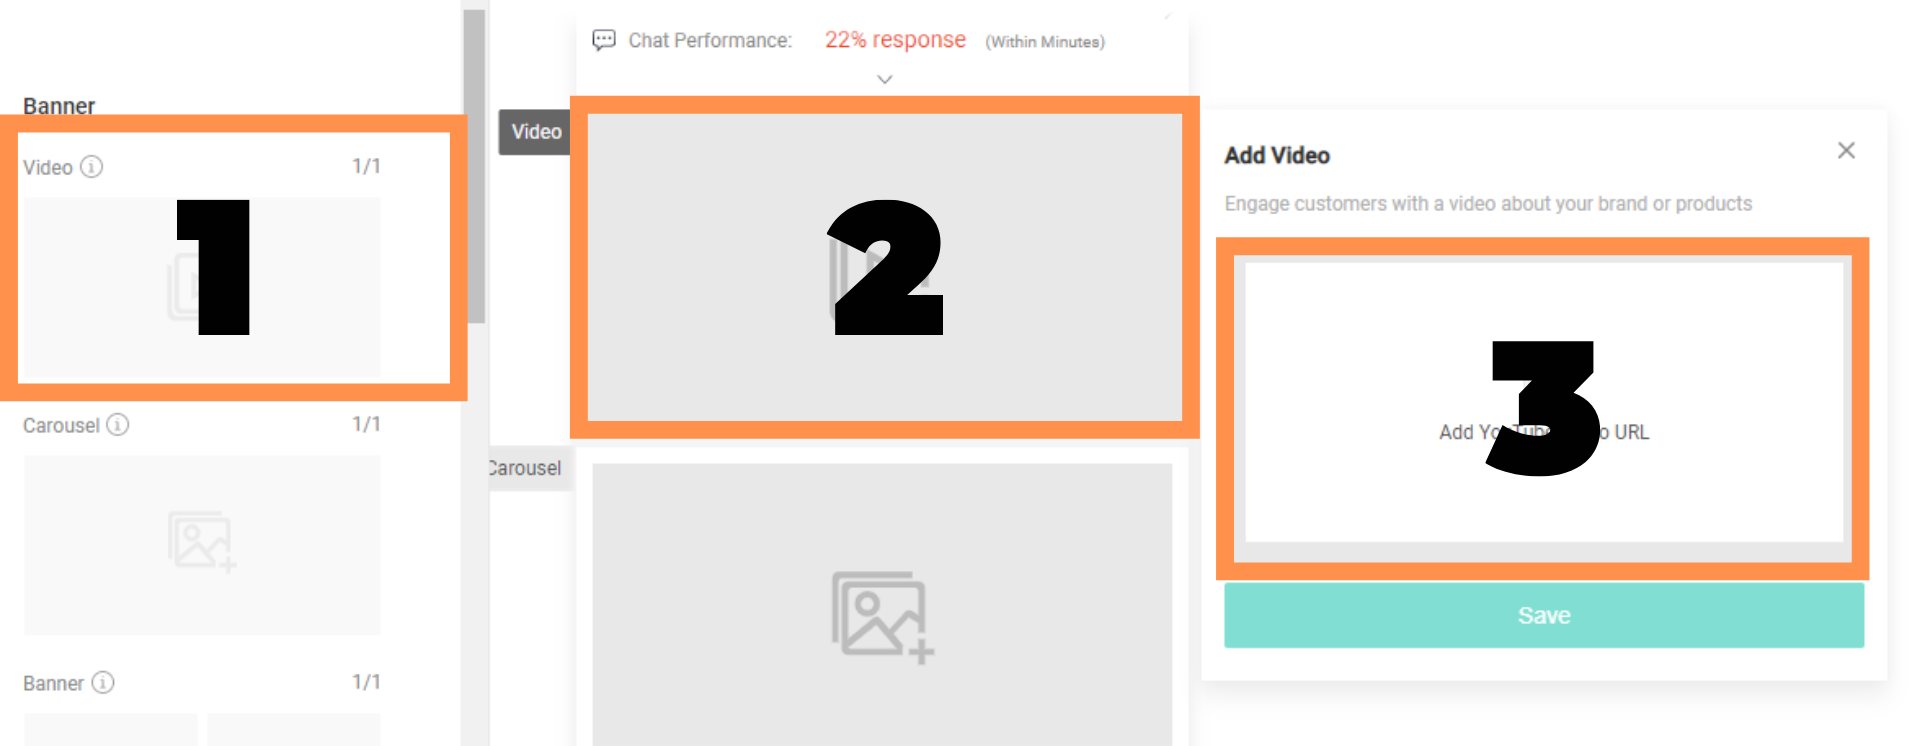
When you click on the video component in the component panel, the video slot will appear on the canvas. Take note that you can only add YouTube URLs here. Go to YouTube first and upload your video.
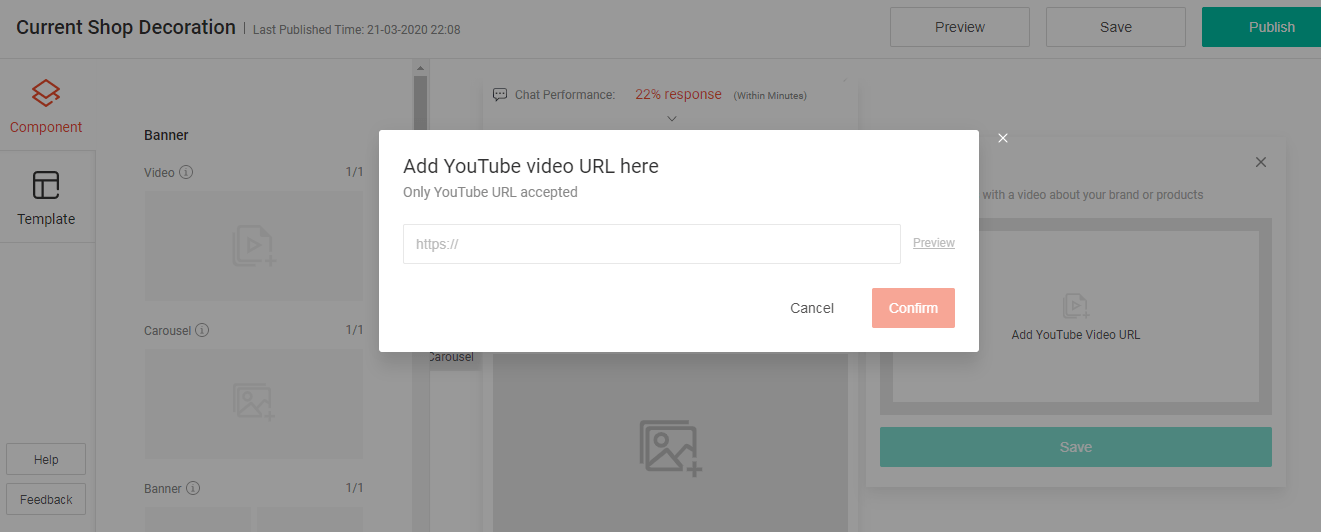
Click the thumbnail on the components property panel to and copy-paste your YouTube URL. Choose to confirm.
Outrank your competitors & increase your sales within the next 30 days.
Be a successful marketplace seller!
Learn MoreBy signing up, you agree to the Terms of service and Privacy Policy
Banner
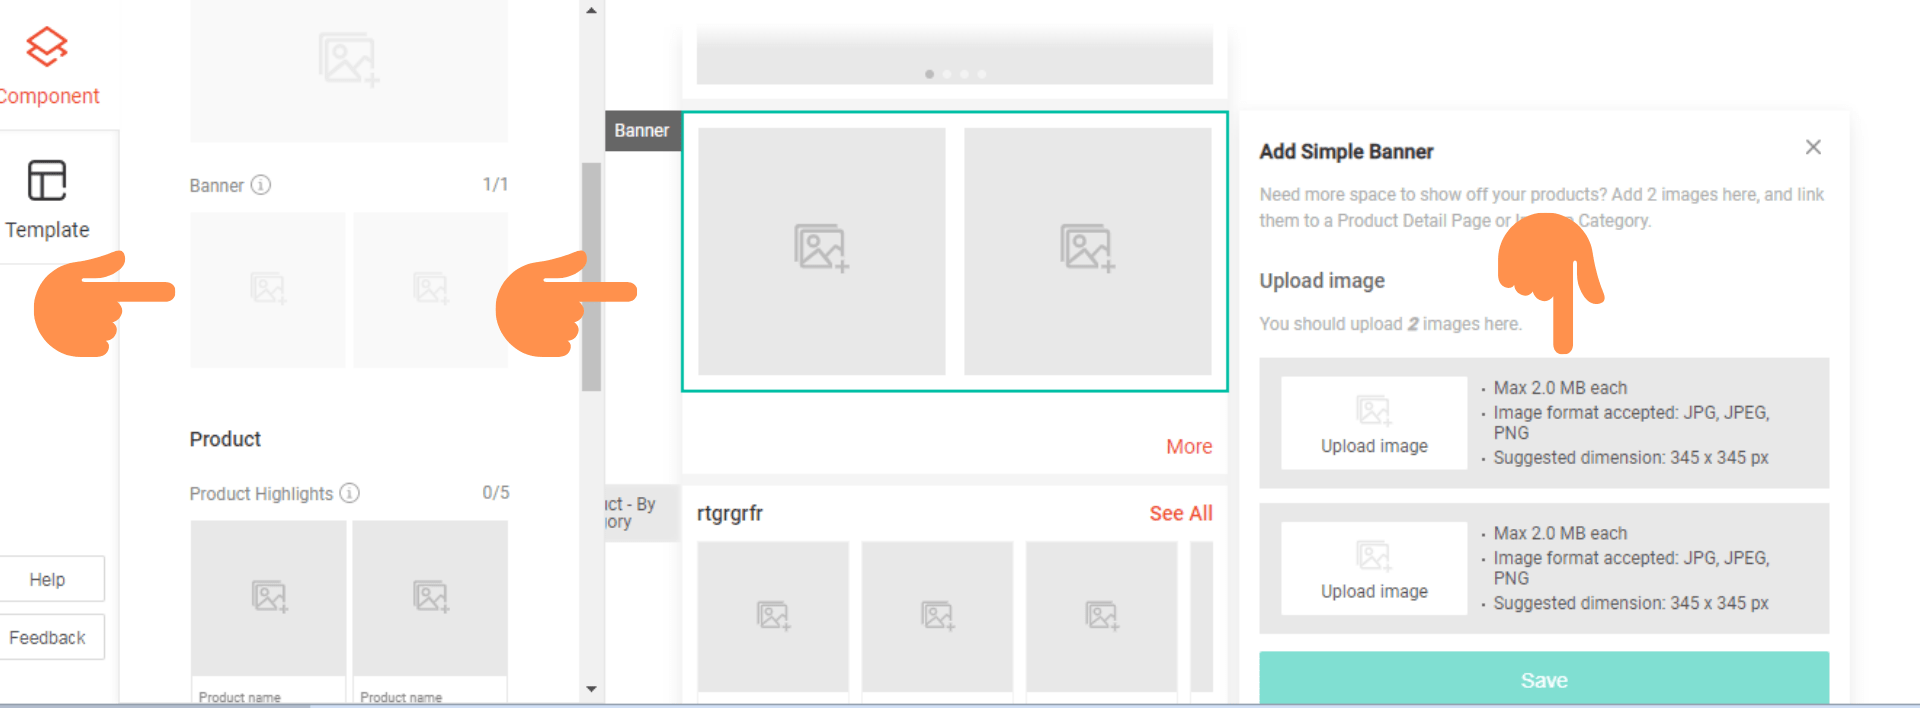
Choose the Banner component. Click the upload image thumbnail on the component property panel.
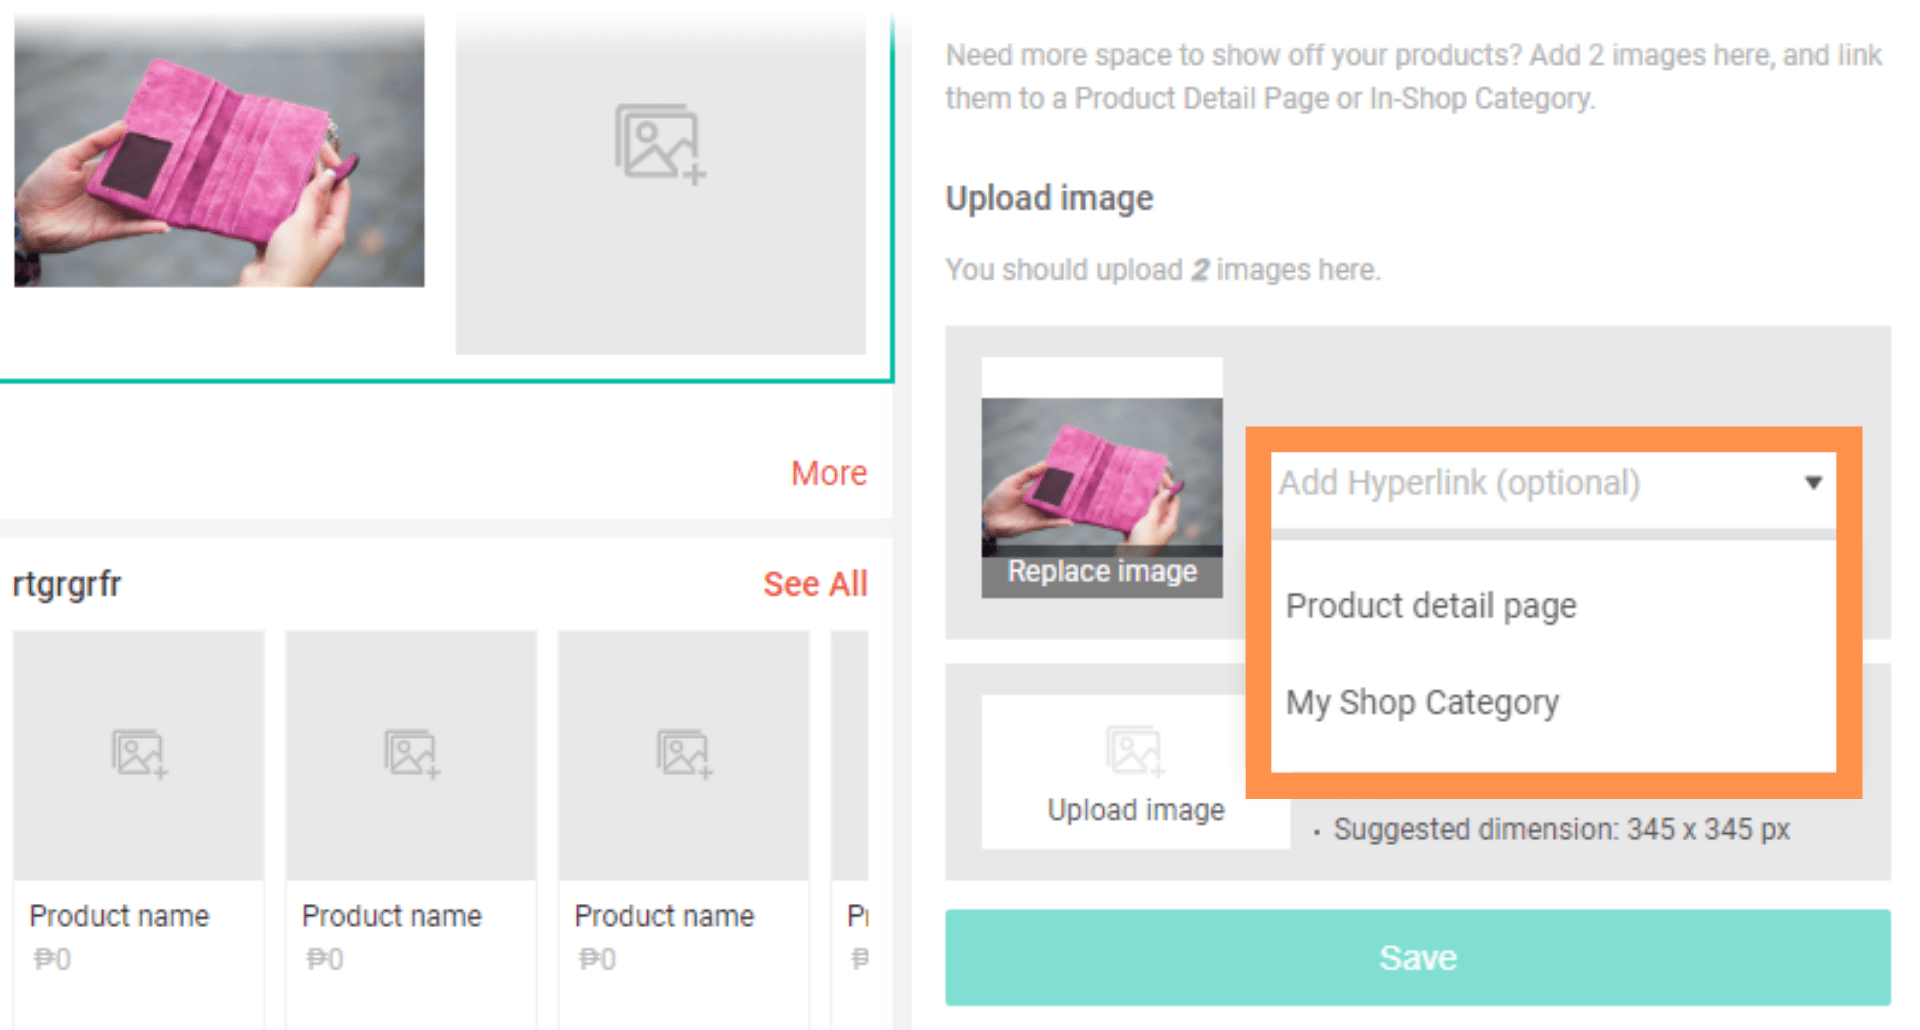
Once you add an image, there is an option to add a hyperlink as well. Hover your pointer to Add Hyperlink to choose whether you want to link the image to your product detail page or My Shop Category.
If you choose to link to your product detail page, you will be asked to choose only one product from all of your listed products.
The same thing goes for choosing to link to your category page. You can choose one active category.
Take note that each image needs to be 2 MB and are saved in JPG, JPEG, or PNG format. The recommended dimensions are 345×345 px.
Product Highlights
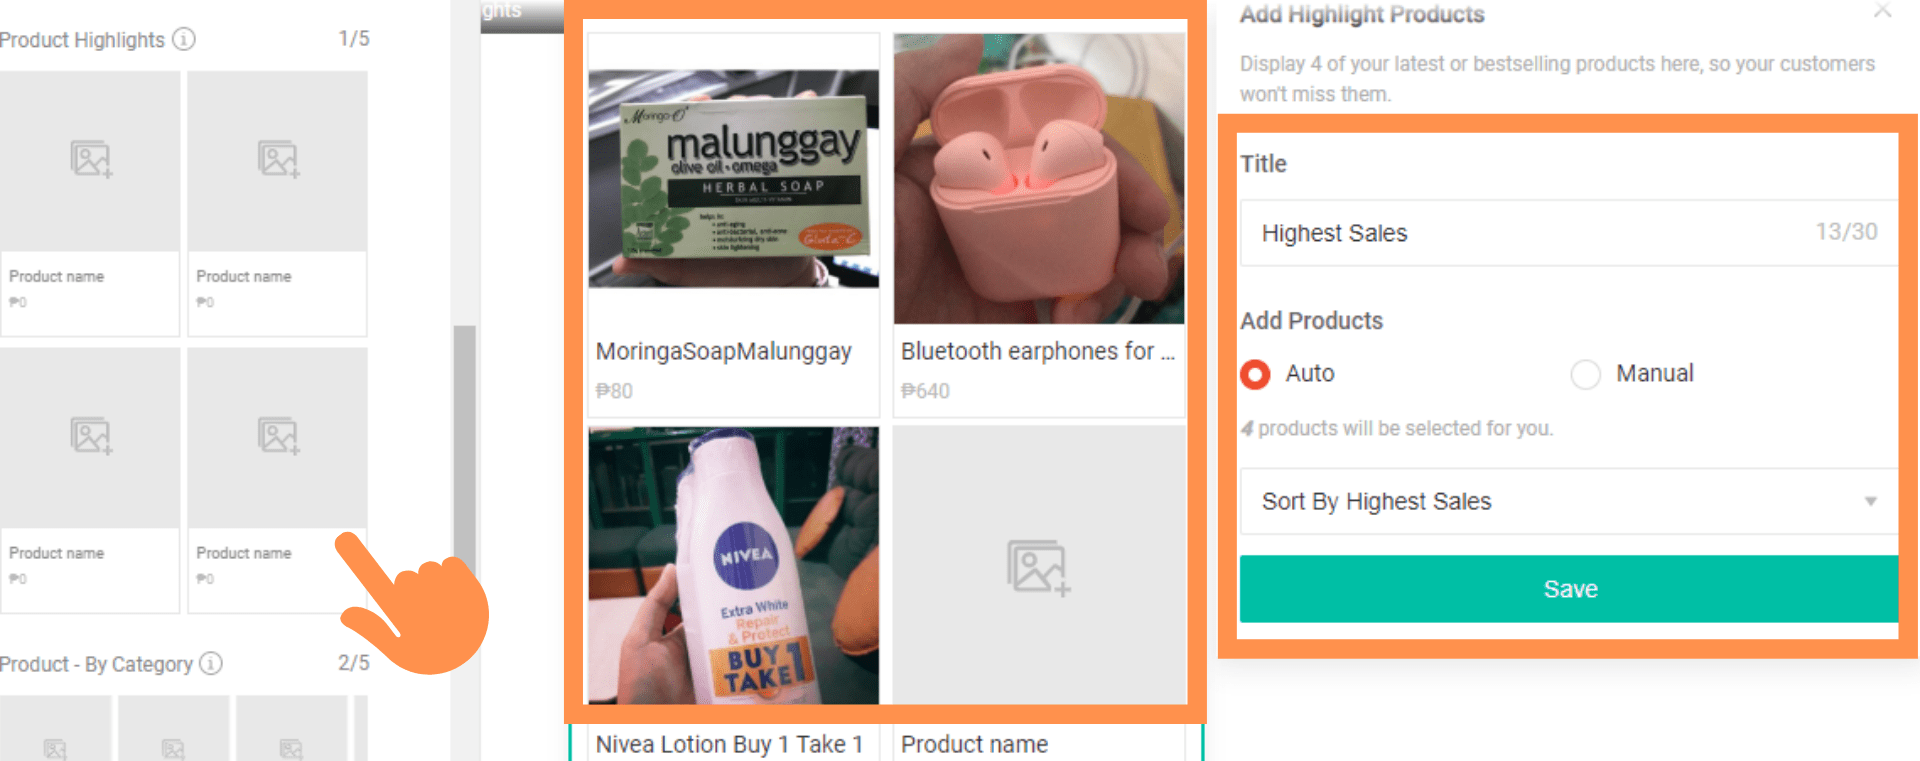
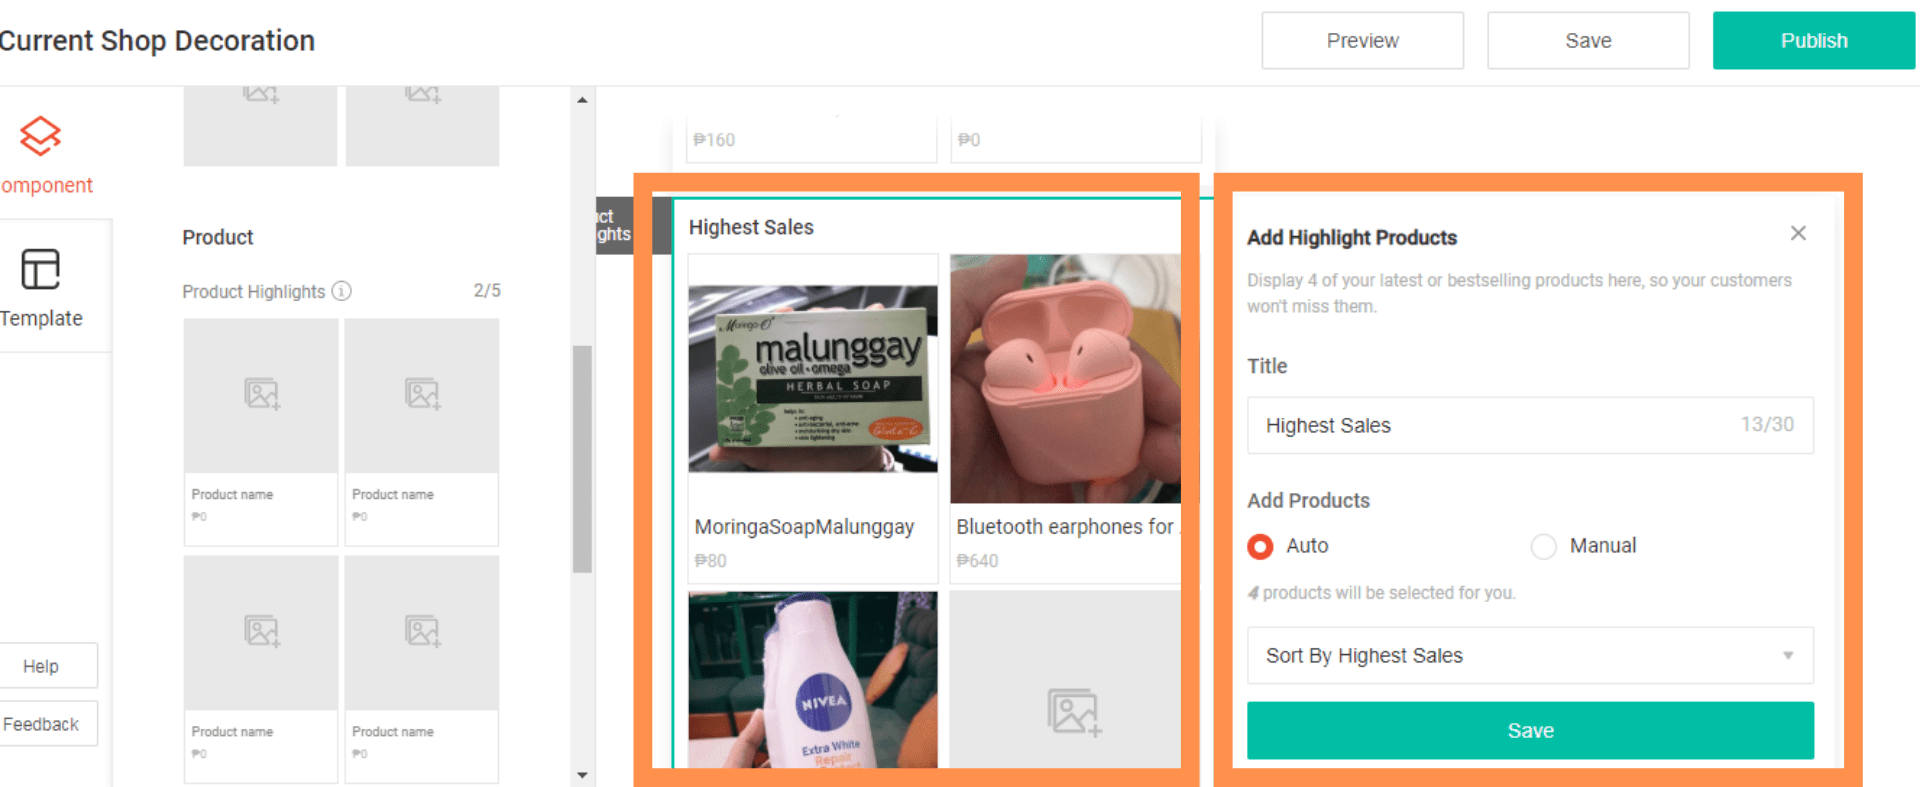
Click Product Highlights. By default, the system will automatically choose the products to be included in the component.
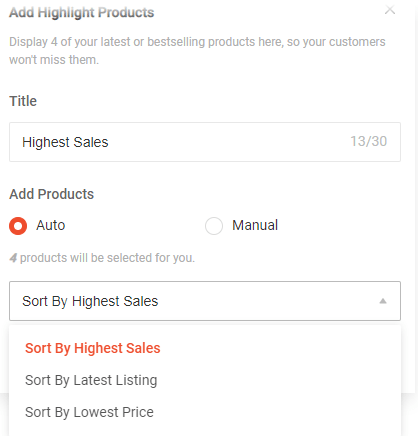
Under the automatic settings, you can program the system to choose your products based on the highest sales, latest listing, or lowest price.

Edit the title to something that will catch buyers’ attention. 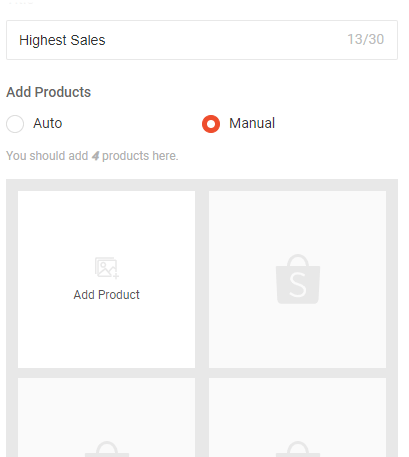
You have the option to change it to manual in the component property panel if you want to be the one to choose which products to put in display in Product Highlights.
Click Add Product to start selecting products for your Product Highlights component. Your sold out and delisted products will be automatically hidden from your list. Save your settings.
Category
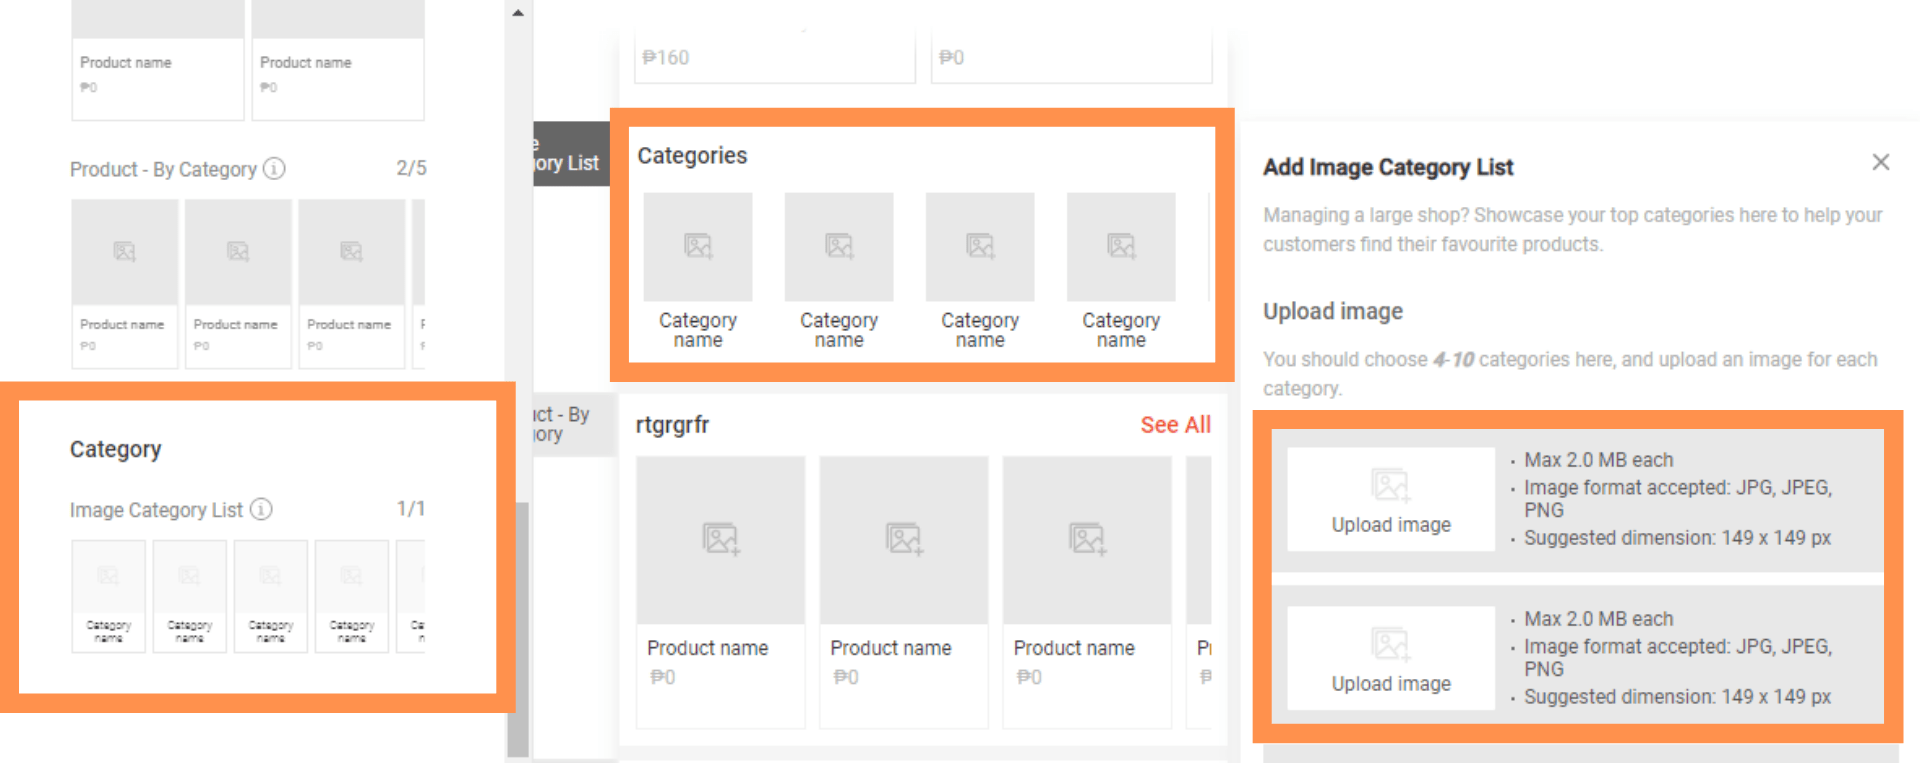
Choose Category from the component panel.
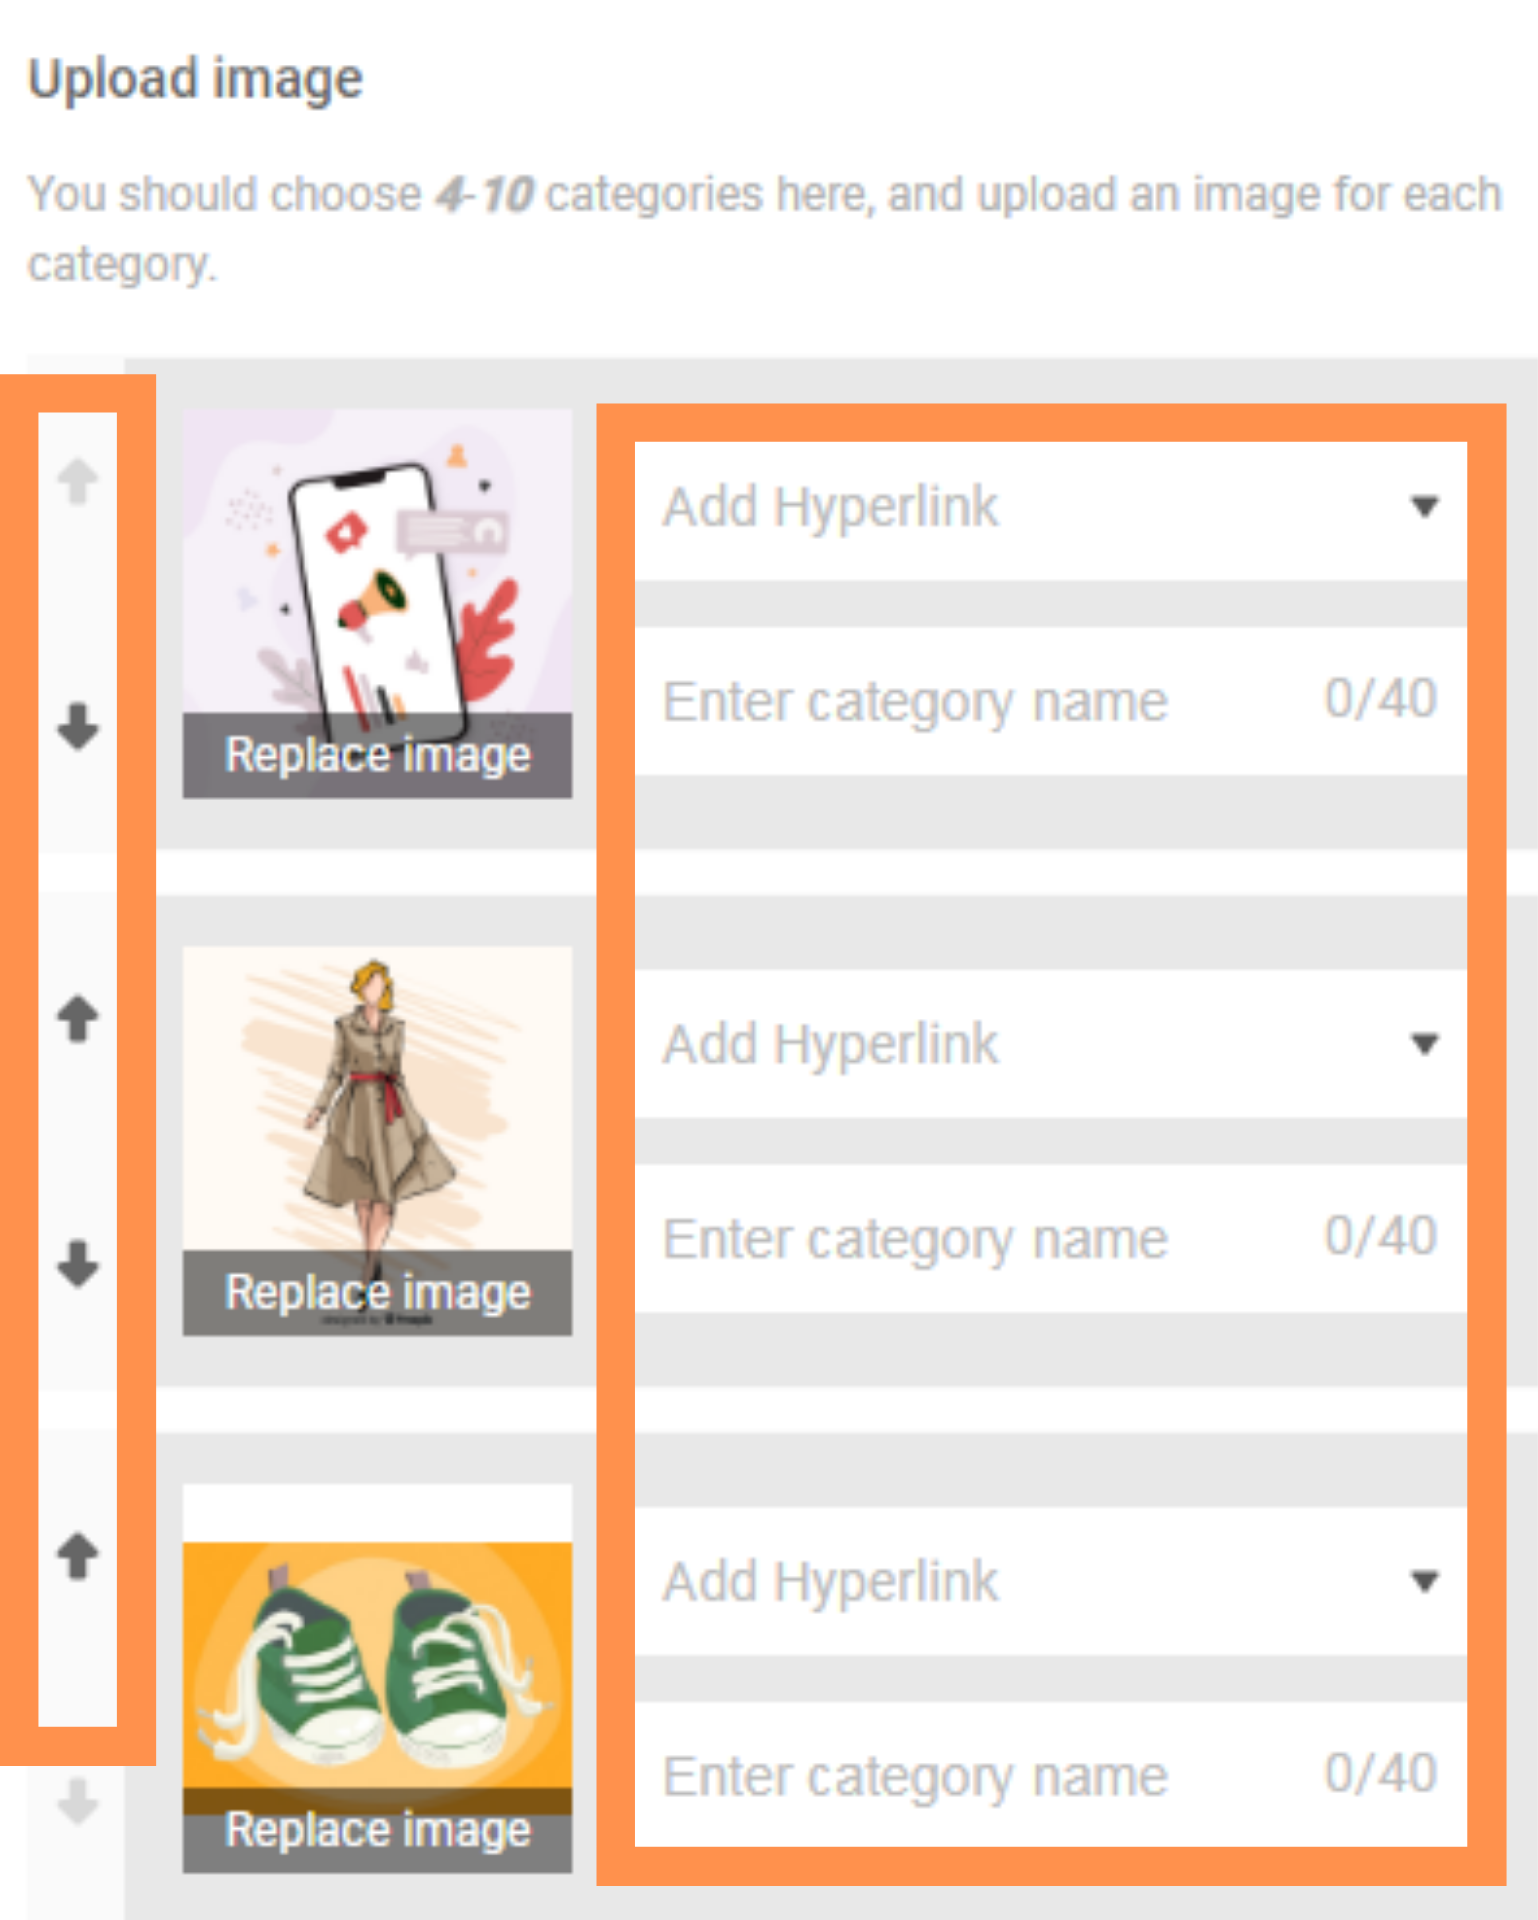
Upload an image per category. The suggested dimensions are 149 X 149px.
Click on the arrows if you want to reorder your categories. Take note that you can add up to ten categories. Before saving everything, don’t forget to enter the category names. There is also an option to add a hyperlink to your category page.
Keep in mind that only active In-Shop categories are supported by Shop Decoration.
How To Edit Components
Click on any component that has been added on the canvas. The selected canvas will then expand to the component property panel. This will enable you to input or edit the properties of your component.
How To Delete Components
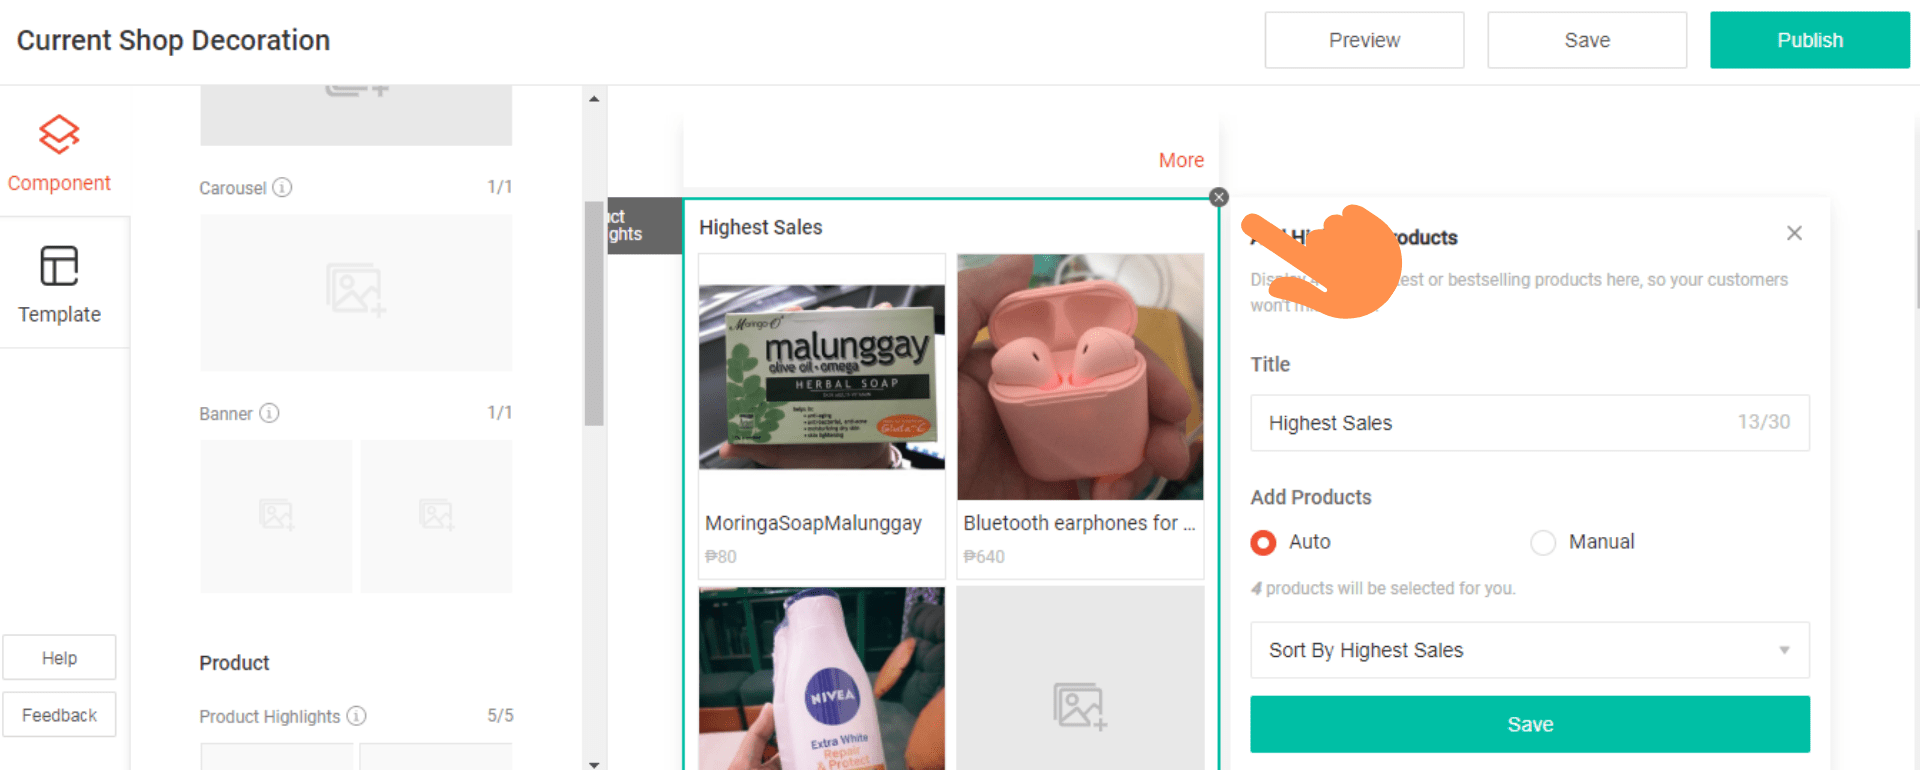
Hover on a component and then click the X button to delete it from the canvas. Take note that when deleting a component, you can only delete it from the canvas and never from the component panel.
You can only delete the optional components from the canvas. Some components are compulsory and are part of the canvas a default.
The optional components are Product Highlights, Video, and Categories. The banner, Product By Category, and Carousel are all compulsory components and will remain in your canvas even after deleting all components.
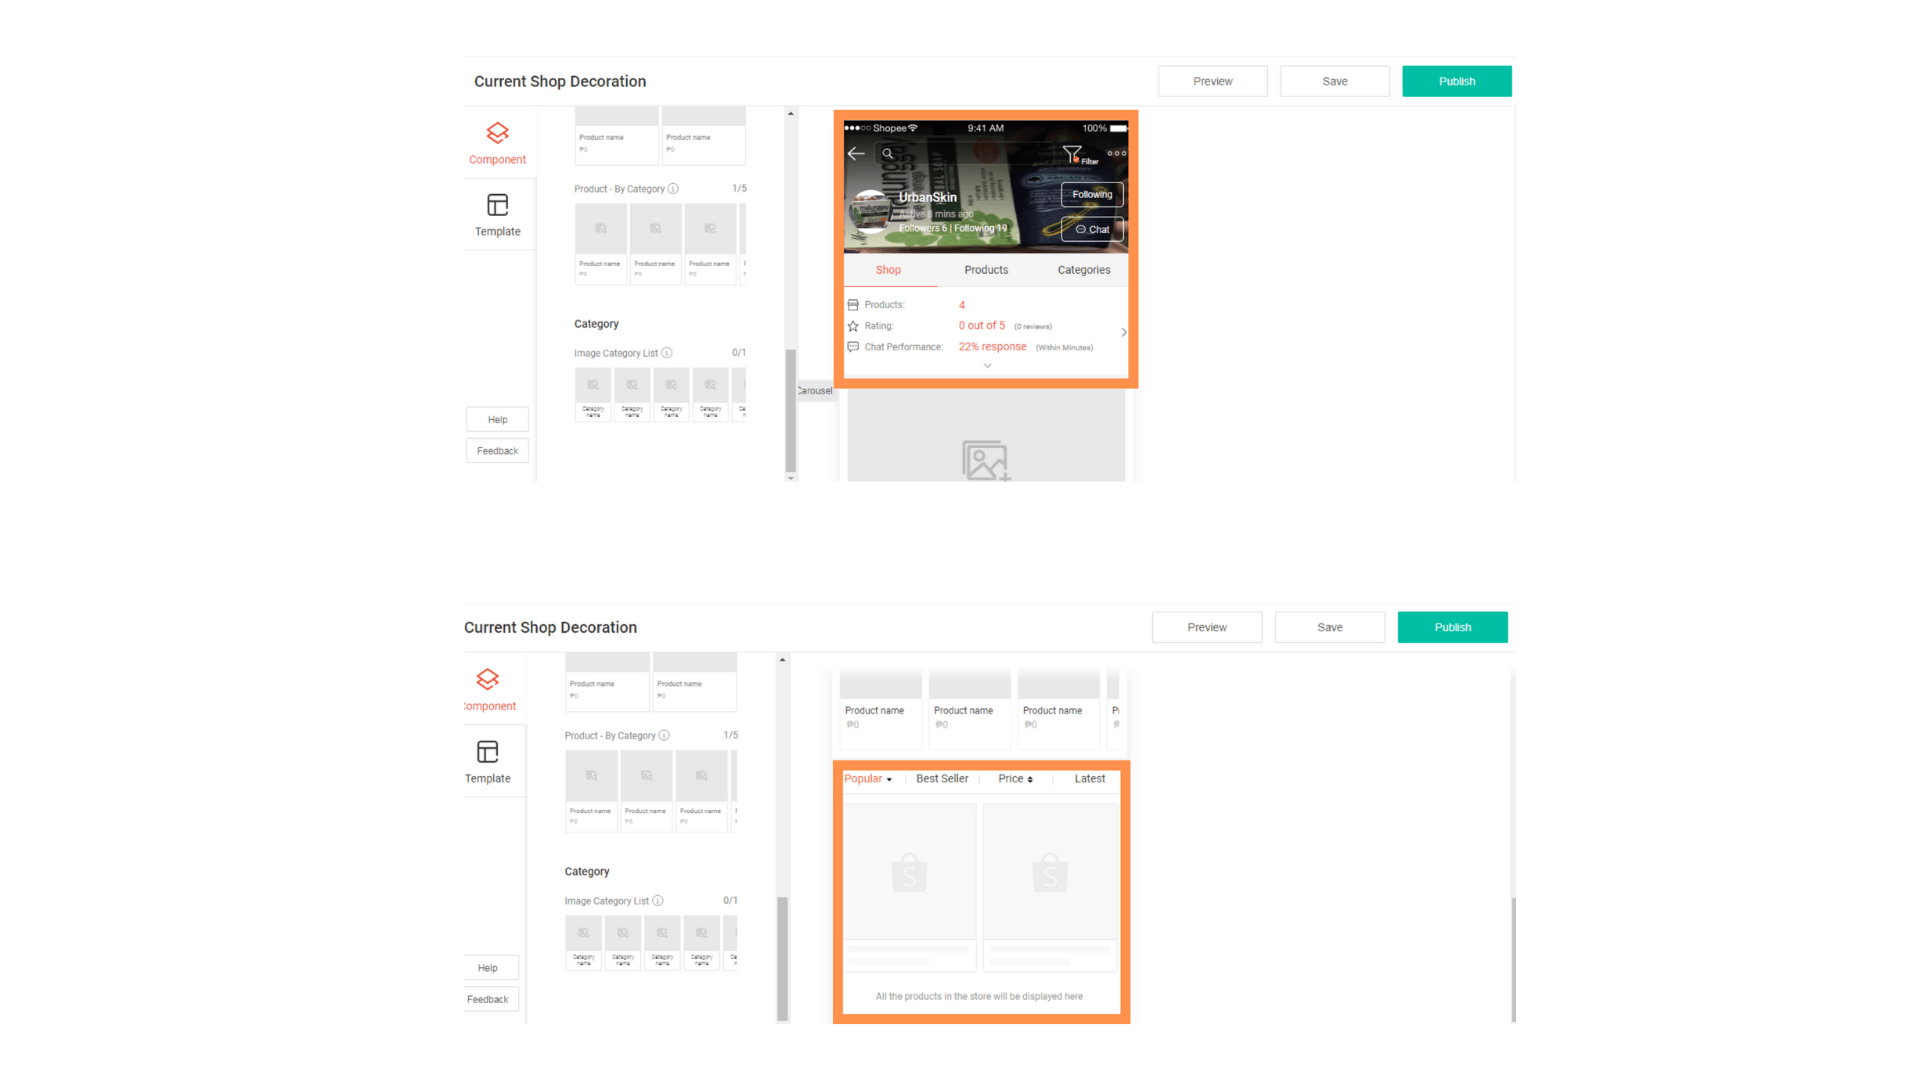
There are two elements in the canvas (not considered as components) that you cannot delete. These are the All Products Section and the Shop Details Section.
The All Products Section is where all your listed products will be shown when a customer visits your page. Meanwhile, the Shop Details Section is where people will find important details about your shop including your Shop name, cover image, profile image, as well as a summary of the number of products that you have. Your chat performance and store review are also summarized there.
How To Complete Shop Decoration
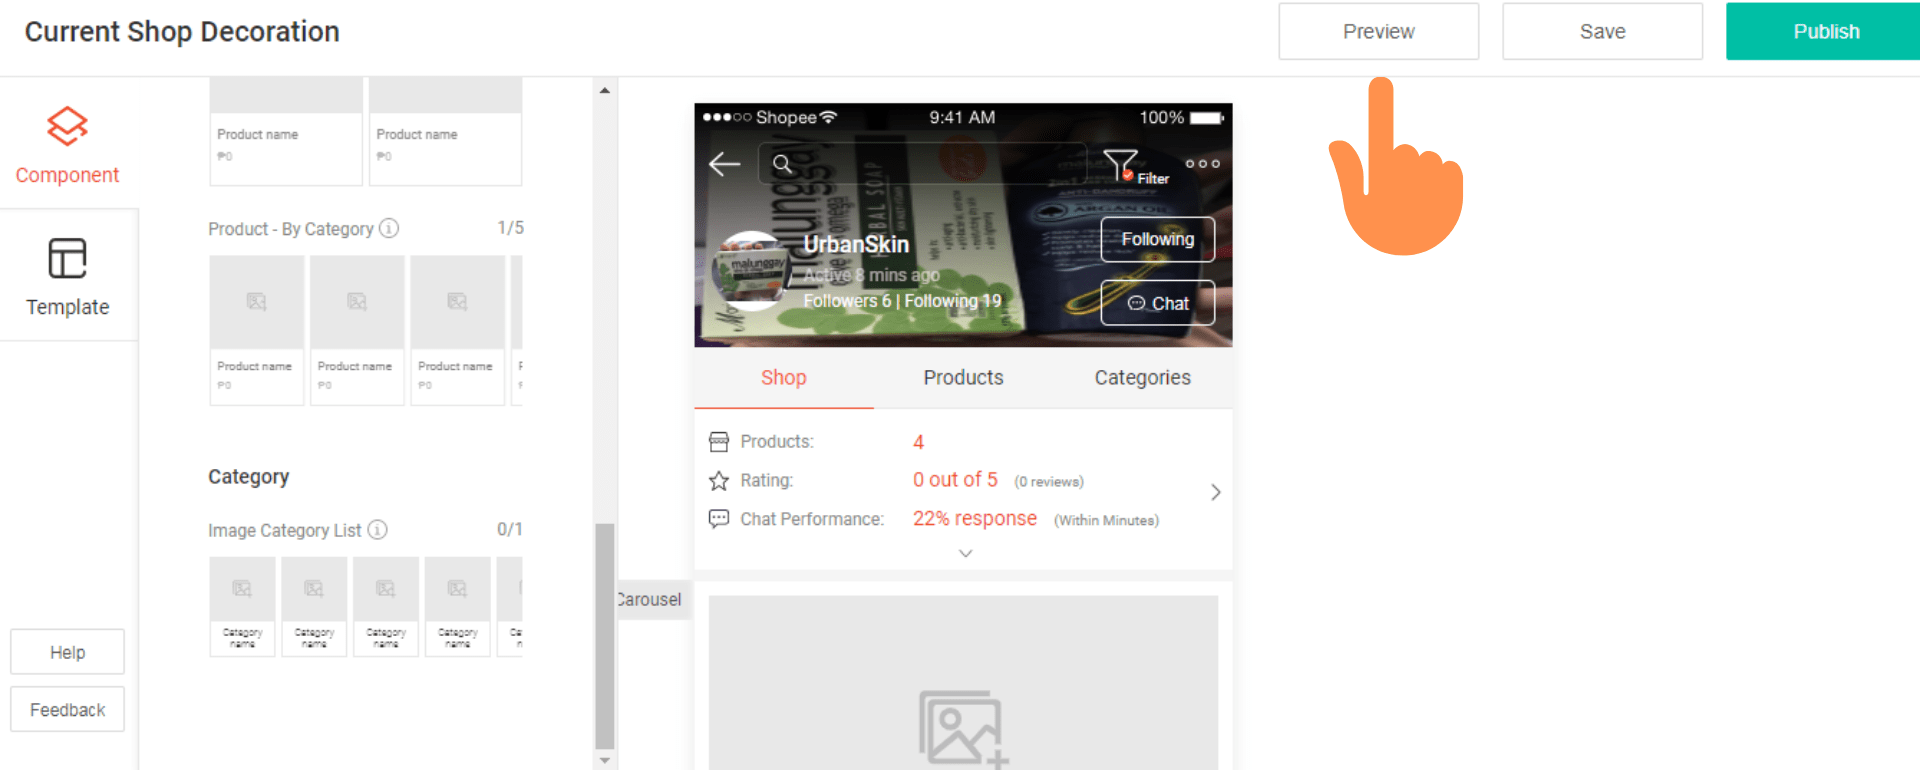
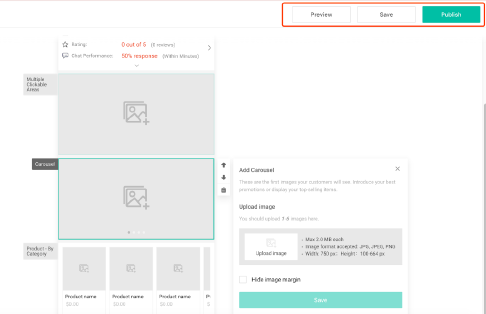
If you want to give your shop one final look before finally saving it on Shop Decoration, click Preview. 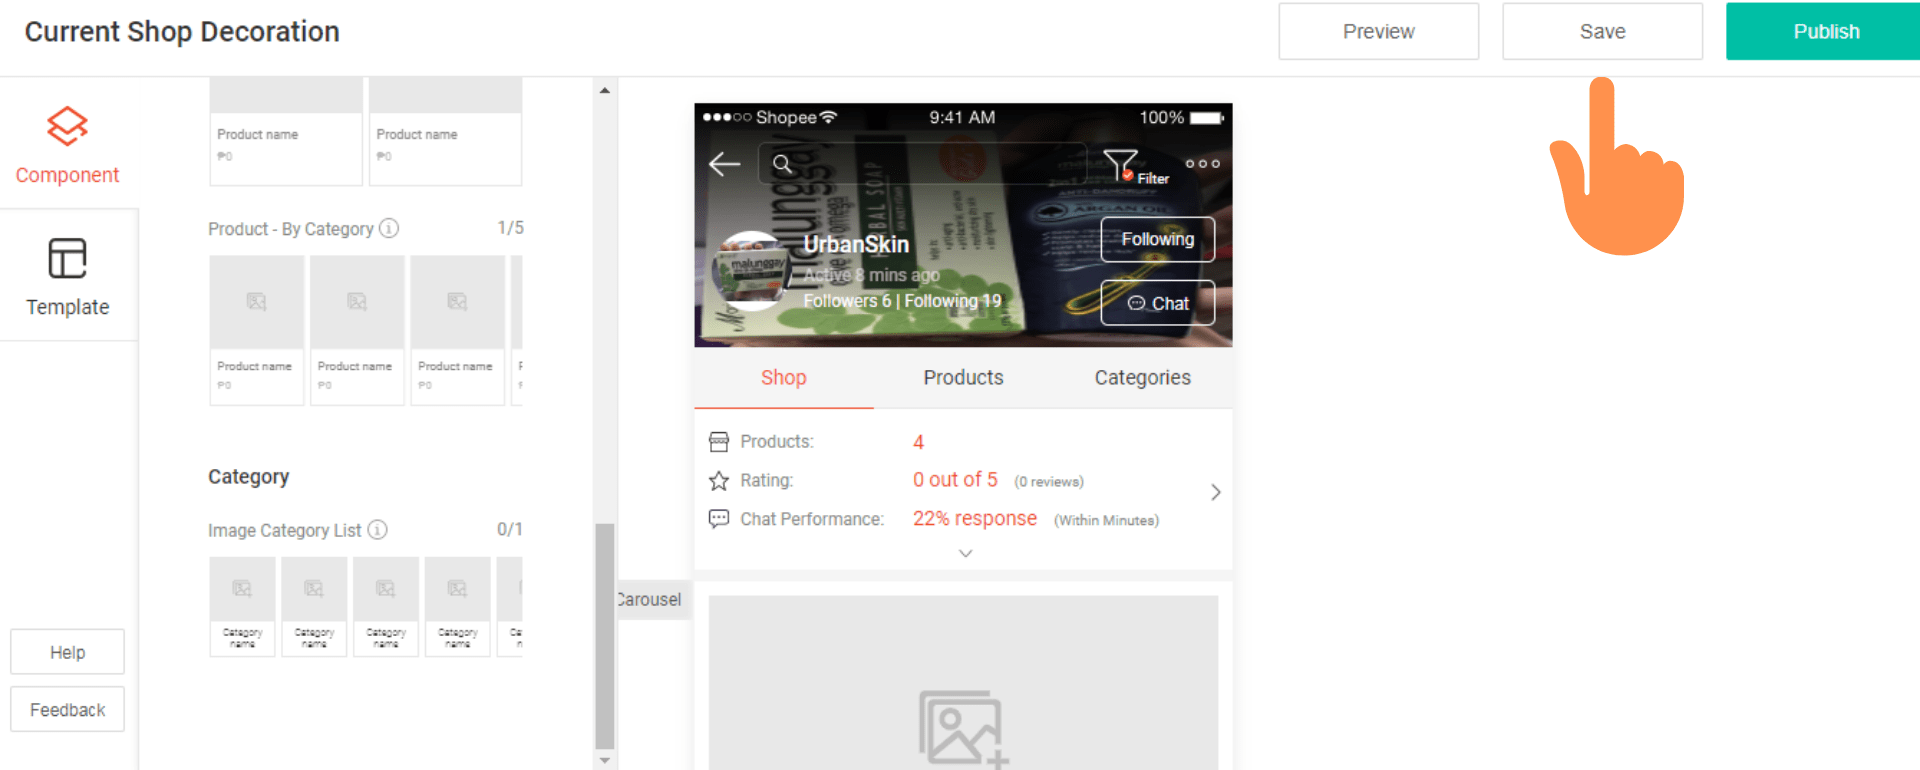
You can also save it as a draft if you still feel unfulfilled. Just click the Save button.
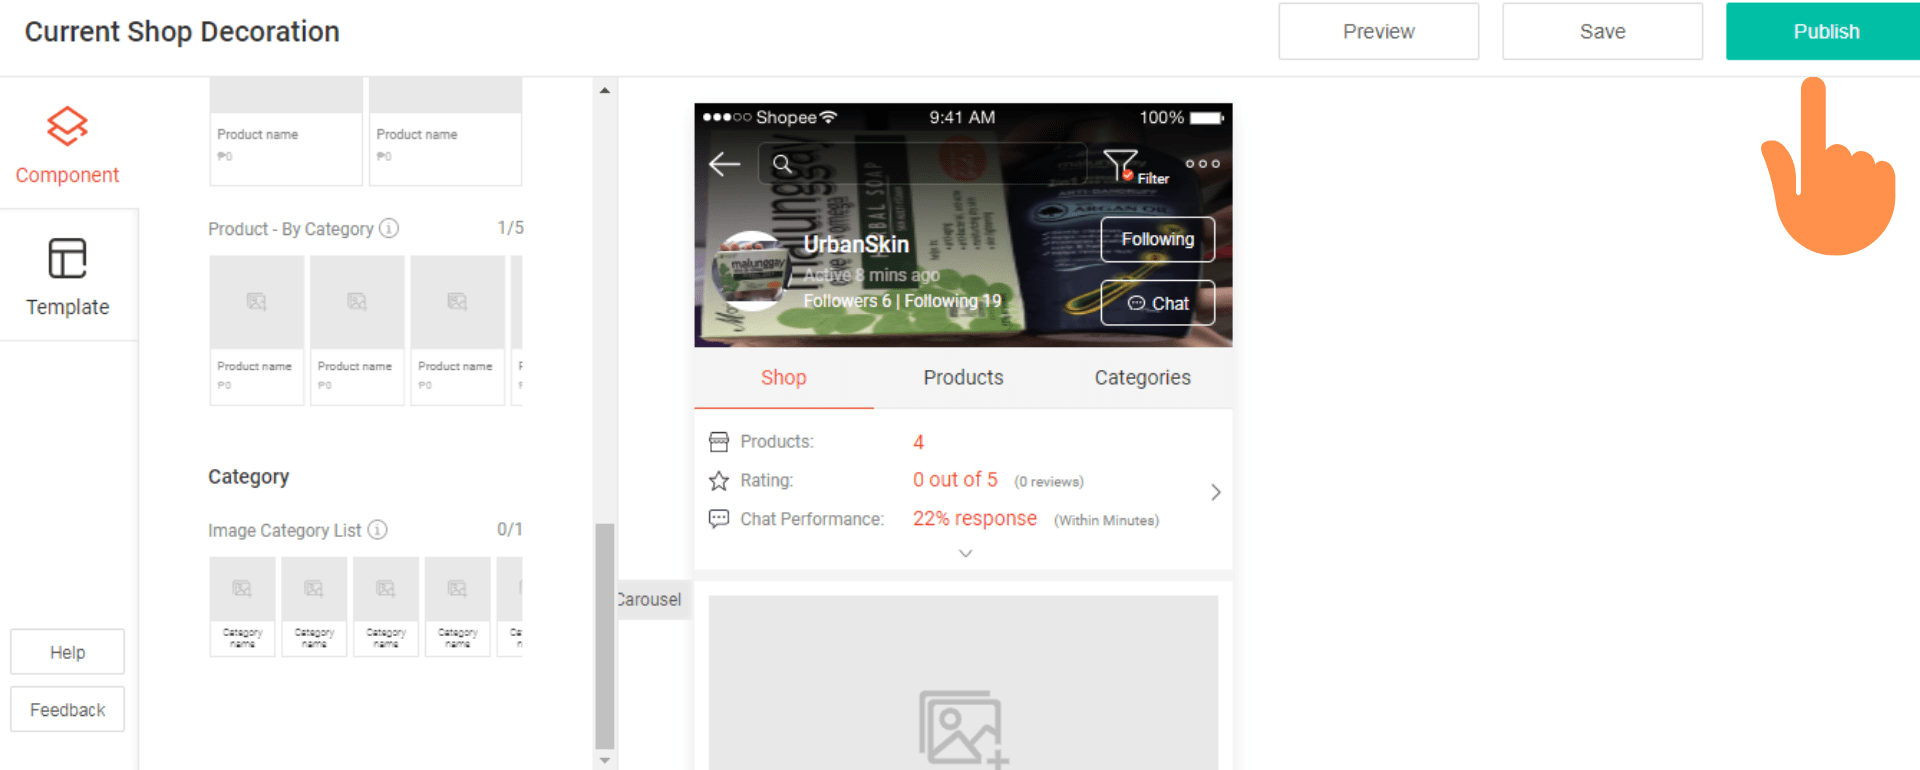 Choose the Publish button once you are ready to publicize your shop’s new look.
If you are unable to publish your Shop Decoration, it means there are still component properties that you need to edit or input. In that case, simply check if all the required details are filled up.
How To Disable Shop Decoration
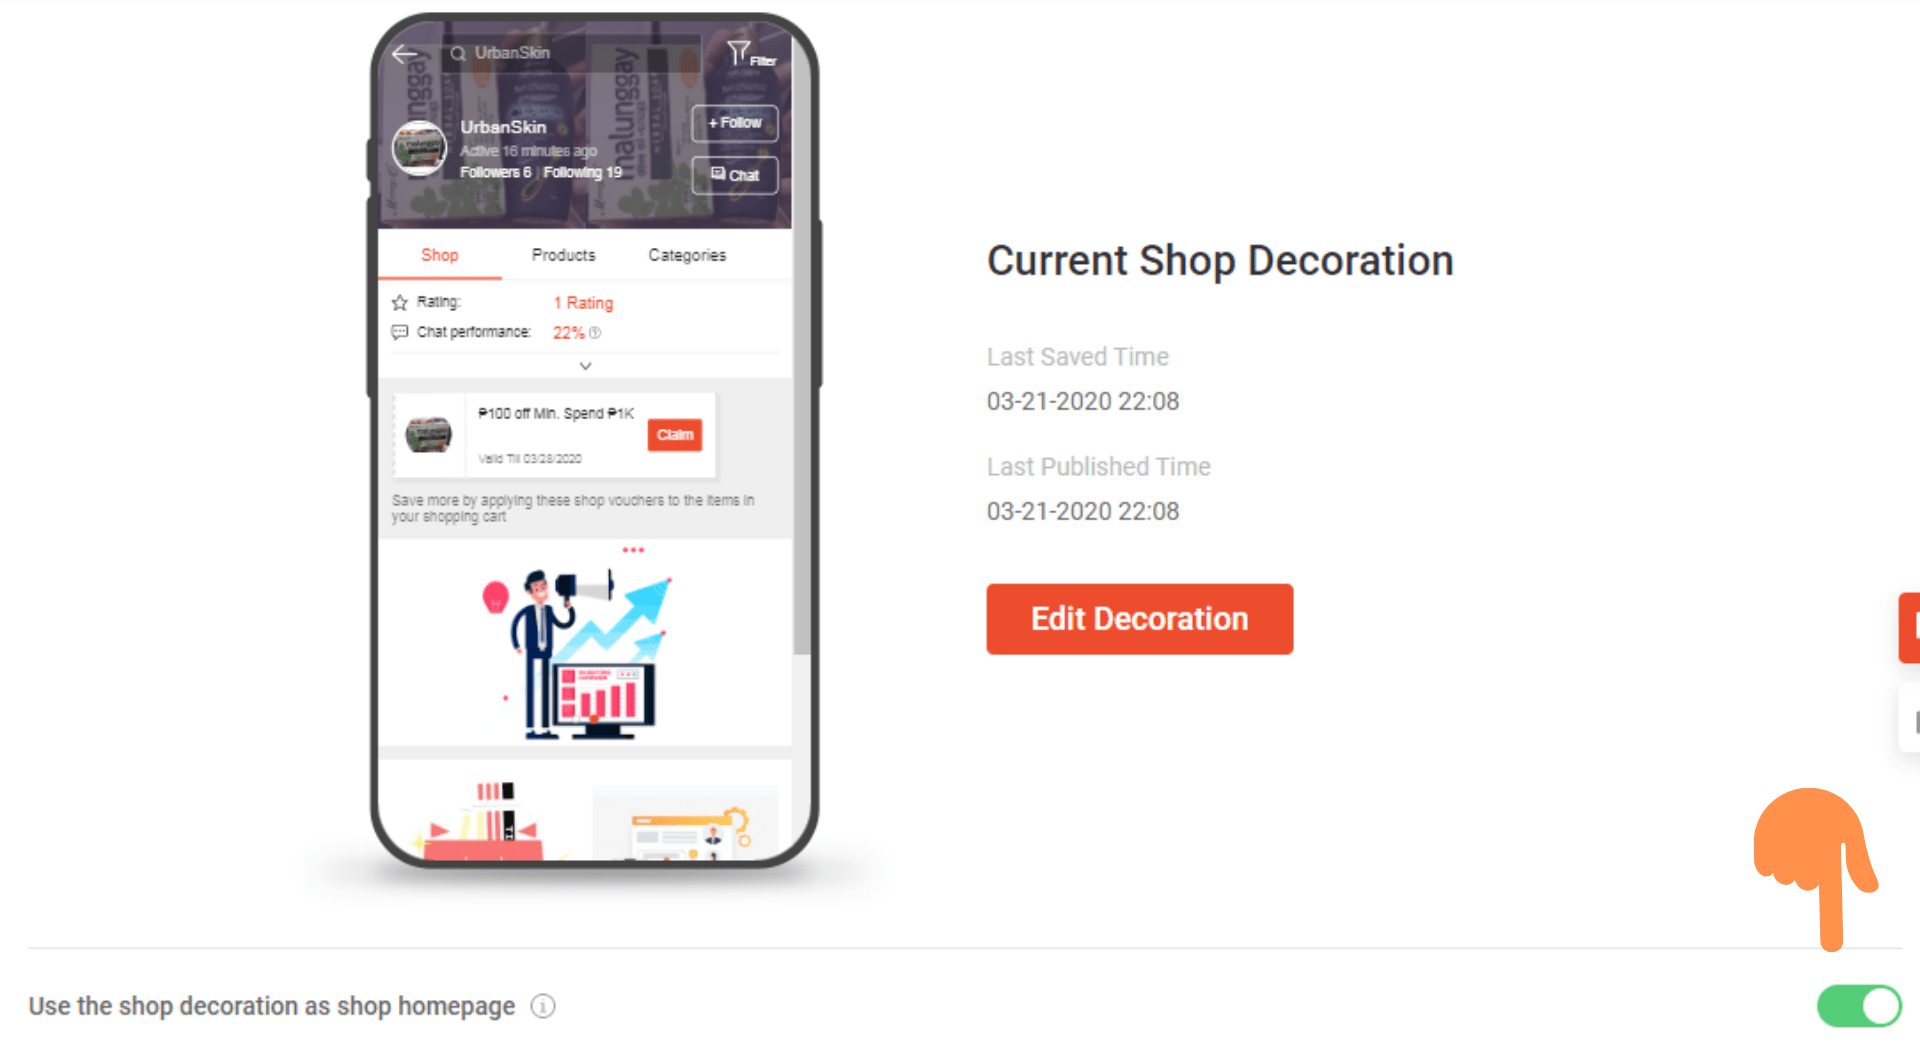
If you want to disable Shop Decoration and would prefer to use the default Shopee business page design, you can do so by going to your Shop Decoration dashboard in Shopee Seller Centre. Click the ticker button found at the bottom.
Introducing Shop Decoration Premium
Shop Decoration Premium is an advanced designer tool for your shop that is offered to selected sellers. It also has the same capability and components as the Shop Decoration Basic but this one has several advancements and new features that you won’t find in the basic version.
Additional Components Of Shop Decoration Premium
- Text category list
- Single image
- Multiple clickable areas
Additional Customization Options
- Rearrangement of the order of the components through the Operation Bar
- Hiding the title and the bottom margin
- Multiple adjustments options for carousel height
How To Use Shop Decoration Premium
You will receive a notification for Shopee if you are qualified for Shopee Decoration Premium. Take note that only selected sellers are able to have access to this feature.
If you receive a notification, you will notice additional components and capabilities added to your Shop Decoration tool.
To use Shop Decoration Premium, log in to Seller Centre and click Shop Decoration under the Shop tab.
Just like what you would normally do in Shop Decoration Basics, you have to click the Edit Decoration button to get started.
Your Shop Decoration edit page will have similar editing features similar to Shop Decoration Basic such as the component panel, canvas, and the component property panel. The Operation Bar has also been added to your list of Shop Decoration features. This will enable you to delete and rearrange the components in your canvas.
Testing Out Your Shop Decoration Premium
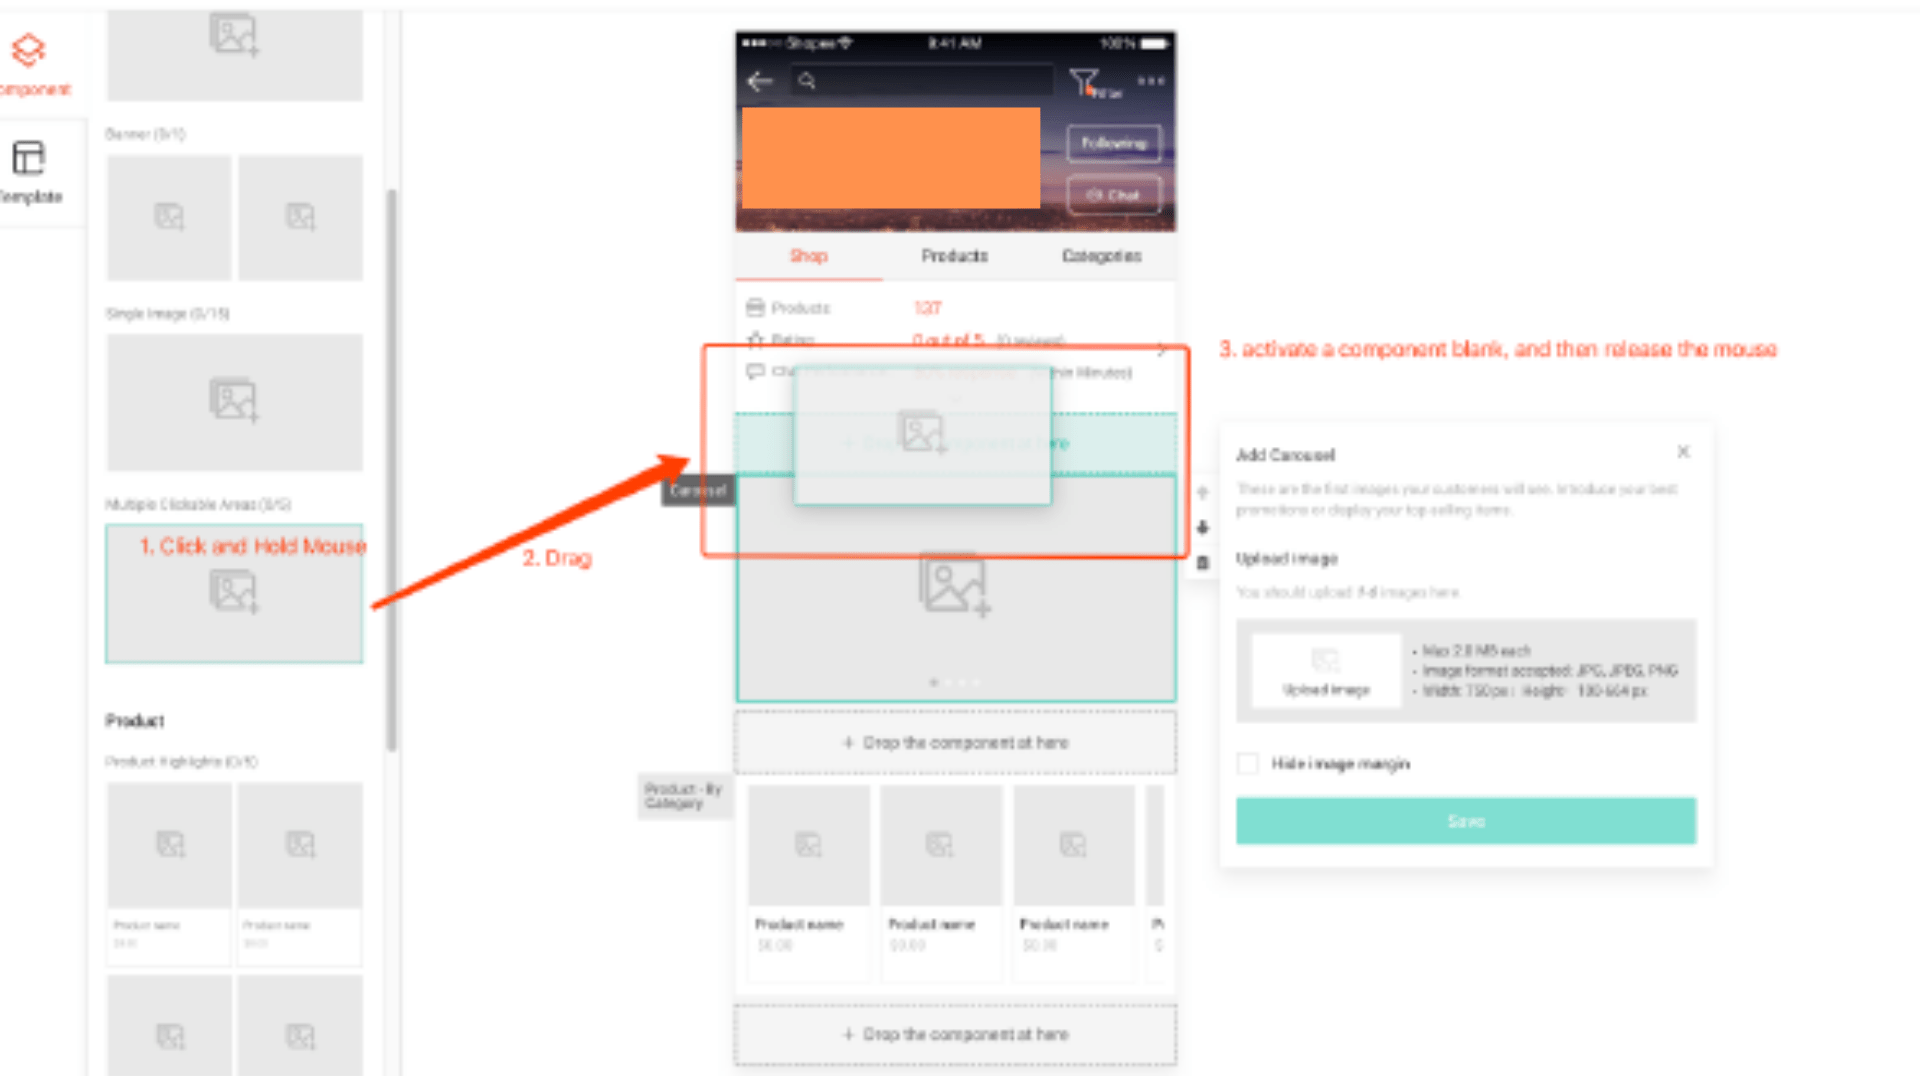
To test your new Shop Decoration tool, start using one of your components. To do so, you can click on a component and watch it become visible on your canvas. You can drag and drop the component and place it on the canvas as well. 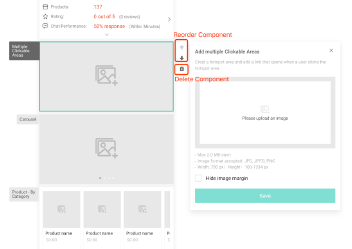
Click the component on the canvas to select it. The operation bar will then appear so you will be able to reorder your component as you please. Click on the up or down buttons to place your component in the order that you want.
If you want to delete the component, simply click the component once again from the canvas. The operation bar will become visible once again. Click the bin icon that sits below the up and down arrows.
The process of editing your components is the same as what you do on your Shop Decoration Basic. Just click on a component from the canvas so the component property panel appears. Depending on the component that you selected, you can then add images, videos, banners, and even hyperlinks to your component. Afterward, click Save.
 After editing all your components, you can preview your shop design. You can also decide to save it as a draft if you still want to edit in the days ahead. Do so by clicking on the Save button. You can also make your new design live then and there by clicking the Publish button.
How To Use Shop Decoration Premium Additional Components And Features
Single Image
Single images enable sellers to bring attention to a particular product or a branding focus. It also gives them the option to promote a wider range of products.
For instance, a single image could feature a whole variety of footwear. You can hyperlink the single image to a product list dedicated for all your footwear products.
The Single Image component can be used to highlight a new or best-selling product, special promotions, as well as what your shop has to offer.
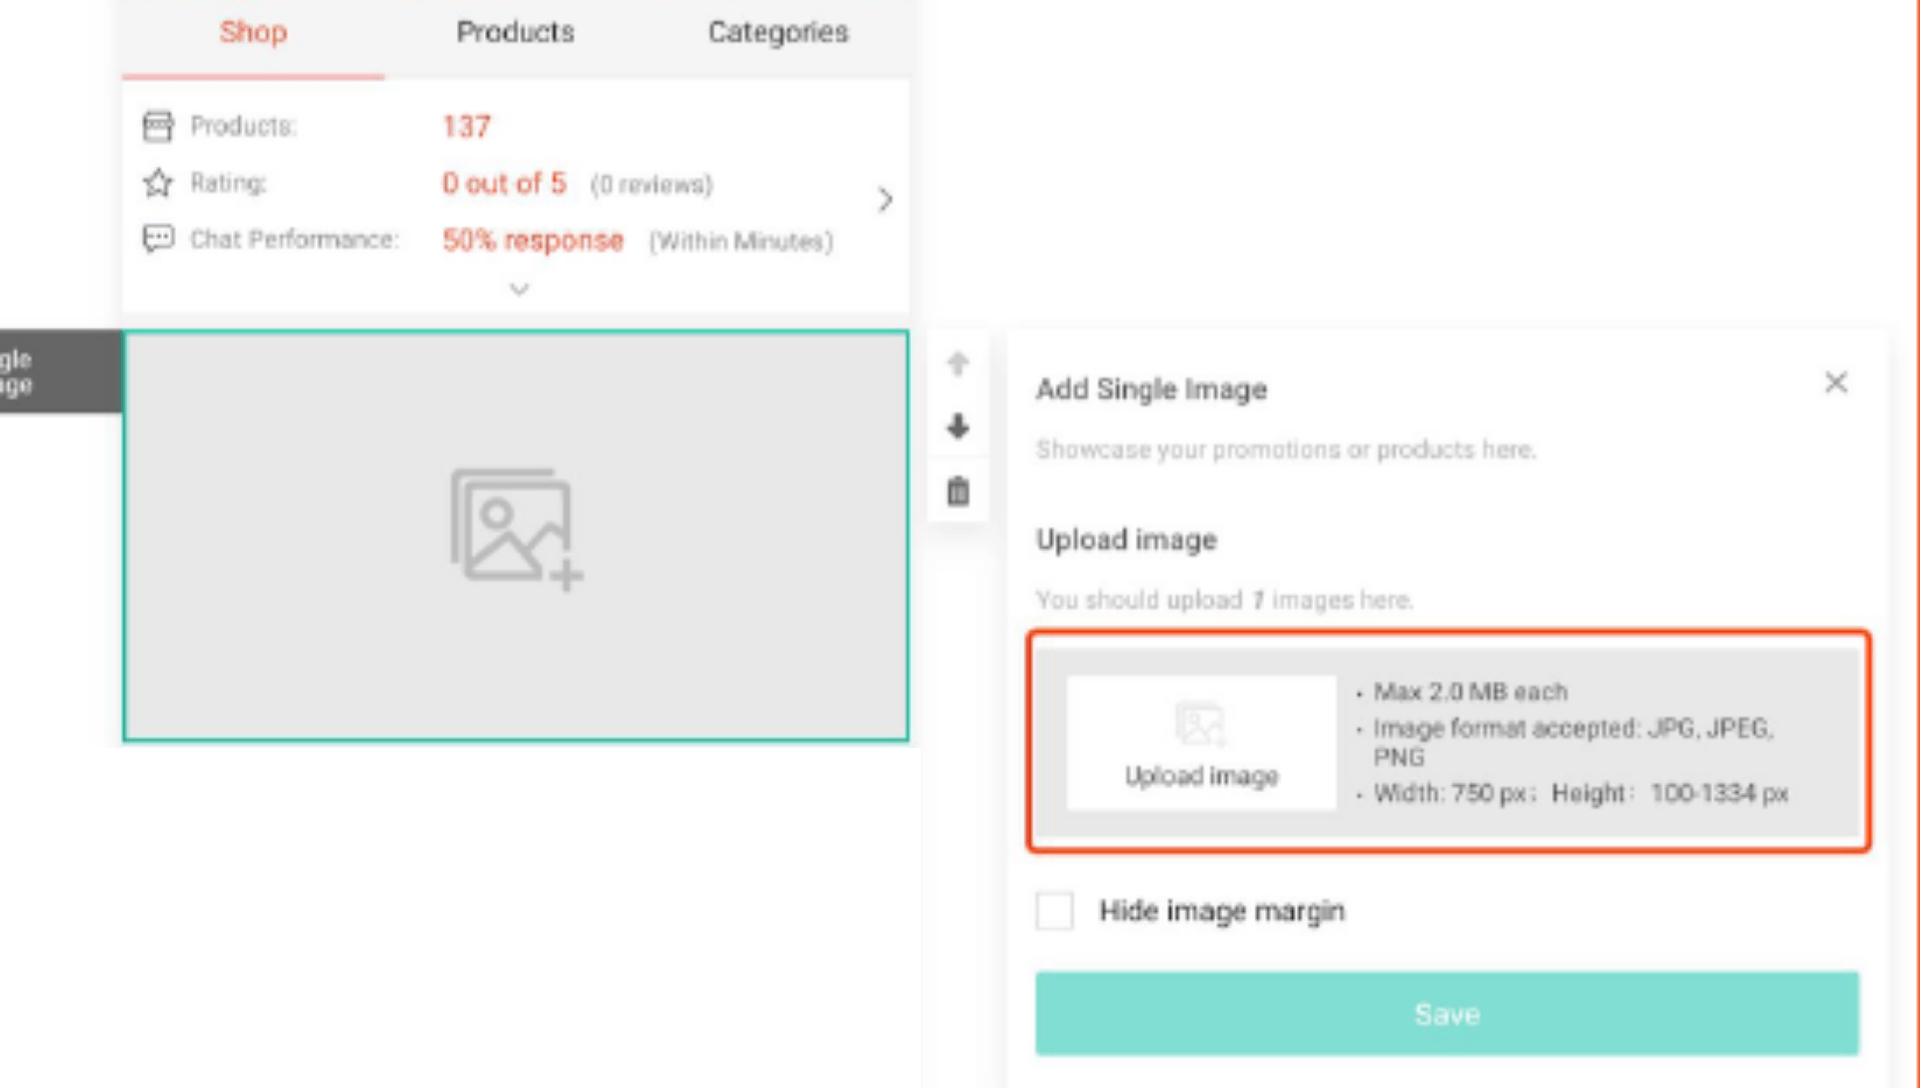
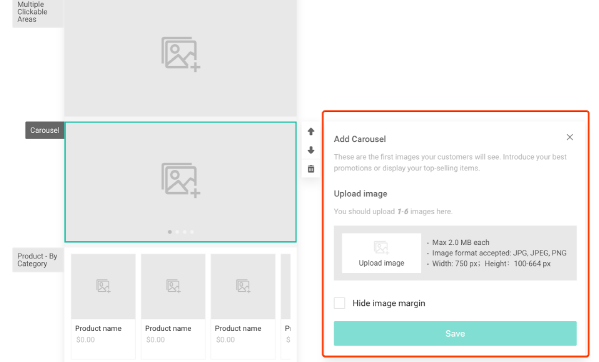
Click on the Single Image component to make it appear on the canvas. Select the component from the canvas. Click the Upload Image thumbnail found in the component property panel.
The images that you upload need to comply with the following requirements:
- Format needs to be in JPG, JPEG, or PNG
- Should have a maximum size of 2 MB per image
- Height of 100px 1334px
- Width of 750px
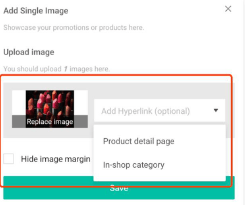
You also have the option to add a hyperlink either to a product detail page or your in-shop category pages.
Click Save once done.
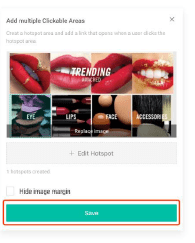
Multiple Click Areas
Through multiple click areas, sellers are able to maximize conversions by hyperlinking to multiple pages in just a single image. This enables you to showcase multiple categories or multiple products in a single image.
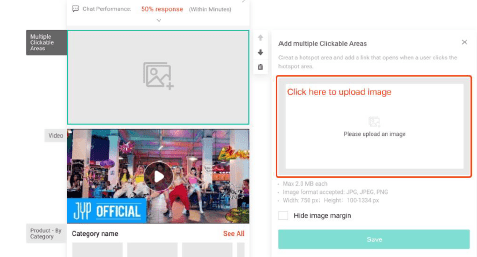
To get started with multiple click areas, click on the component from the component panel to make it appear in the canvas. Select the component so you can work with it in the component property panel.
Click the upload an image thumbnail and select an image.
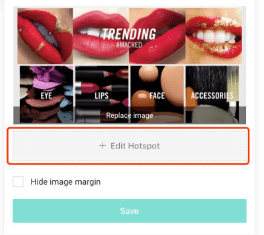
Choose Edit Hotspot.
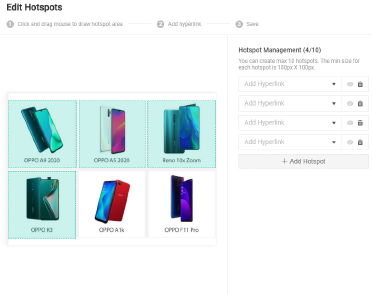 The Hotspot pertains to the spaces within the image where you will add a hyperlink. To add a hotspot you can work with the Hotspot Management tool by clicking Hotspot. You can also draw over certain objects in the image by dragging your mouse.
Reminders For Hotspot Creation:
- You have a maximum of 10 hotspot capabilities
- Your hotspot needs to be quadrilateral with 4 right angles
- Your hotspot needs to have a dimension of 100 x 100 px
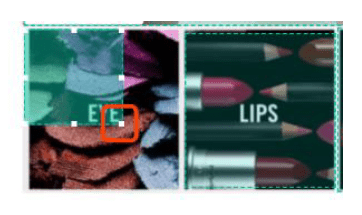
Click on a particular hotspot if you want to adjust its size. The anchor points will appear and you can resize the hotspots by stretching the anchor points in or out.

To add a hyperlink, click on a hotspot and a tiny hyperlink tool will appear. Choose whether to add a hyperlink to an in-shop category or a product detail page. Take note that all hotspots need to have a hyperlink.
Save your progress by clicking Confirm.
Click Save to confirm your component settings.
Text Category List
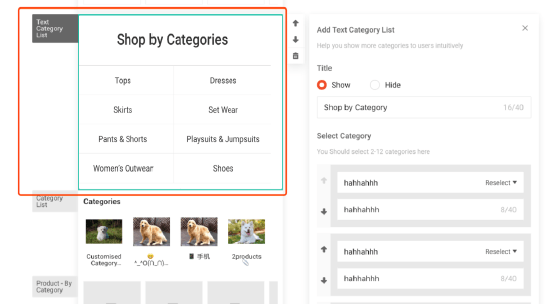
This gives you the option to display your most popular categories in a list format. With that, uploading categories become a lot easier since you don’t need to publish images one by one. Buyers also prefer this kind of format because they get to see all the categories at the same time.
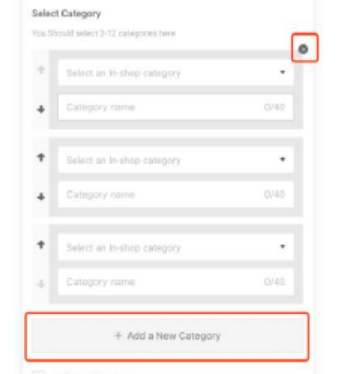
You can add 2 to 12 categories in the list format.
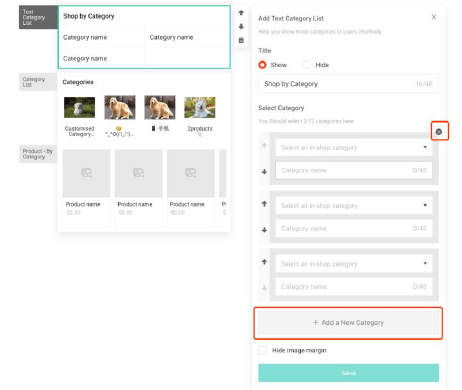
Choose the Text Category List from the component panel. You can add categories through the component property panel. Choose an In-Shop Category. Click on the In-Shop Category Selector and choose from your list of active categories.
Take note that when you select a category, the title will automatically appear in the category name box but you can still modify it. If you need to add more categories, you can click the Add a New Category button.
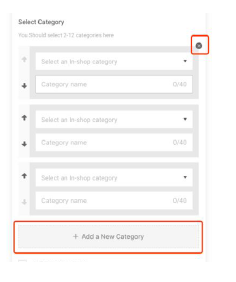
You can also rearrange the order of your categories by clicking on the up and down buttons. The categories can also be deleted by hovering the pointer over the specific category and then clicking Delete.
How To Use Shop Decoration Premium Additional Customization Options
Hiding The Title And Margin
In Shop Decoration Basic, there is a white bottom margin that separates every component from each other. There is also a specific title reserved for each distinct section.
Shop Decoration Premium lets you hide the title and bottom margin so you can have one cohesive and seamless image design.
You can select Hide and click Save if you don’t want the title to be visible in your component.
Below the sorting tool in the component property panel, you can tick on Hide Bottom
Margin and click Save.
Multiple Adjustment Options For Carousel Height
A carousel is an excellent tool for sellers since it lets them autoplay up to six images in just one frame.
One of the major differences between the carousel in Shop Decoration Basic and Shop Decoration Premium is the standard size requirement.
In Shop Decoration Basic, the images need to fit in the standard size requirement. Now, in Shop Decoration Premium, you will be able to create more visual impact within your images through various height ranges for the carousel.

Click on a new carousel component from the component panel to get started. On the component property panel, click Upload Image. You can also add a hyperlink as an option. Before anything else, you need to make sure that all images in the carousel are of the same dimensions. Save your settings and then you are all set.
So remember this, when you feel like you need to increase your shop’s visibility – you may actually just need to spice it up, it really is as simple as that. Shop Decoration is an excellent way to enhance the visual appeal of your Shopee store and communicate your brand, helping you build your credibility and attract customers at the same time!
Want to stay on top of the competition?
Split Dragon offers support with your e-commerce needs using conversion-Focused tools and data-driven solutions. Contact us today to see how we can help you with tailored strategies that will drive your company’s success!